Feeds:
Posts
Comments
Koi Pond, by Adrianne Lobel, 2005.

Recipe below: Roasted Red Snapper with Fennel Rosemary Vinaigrette

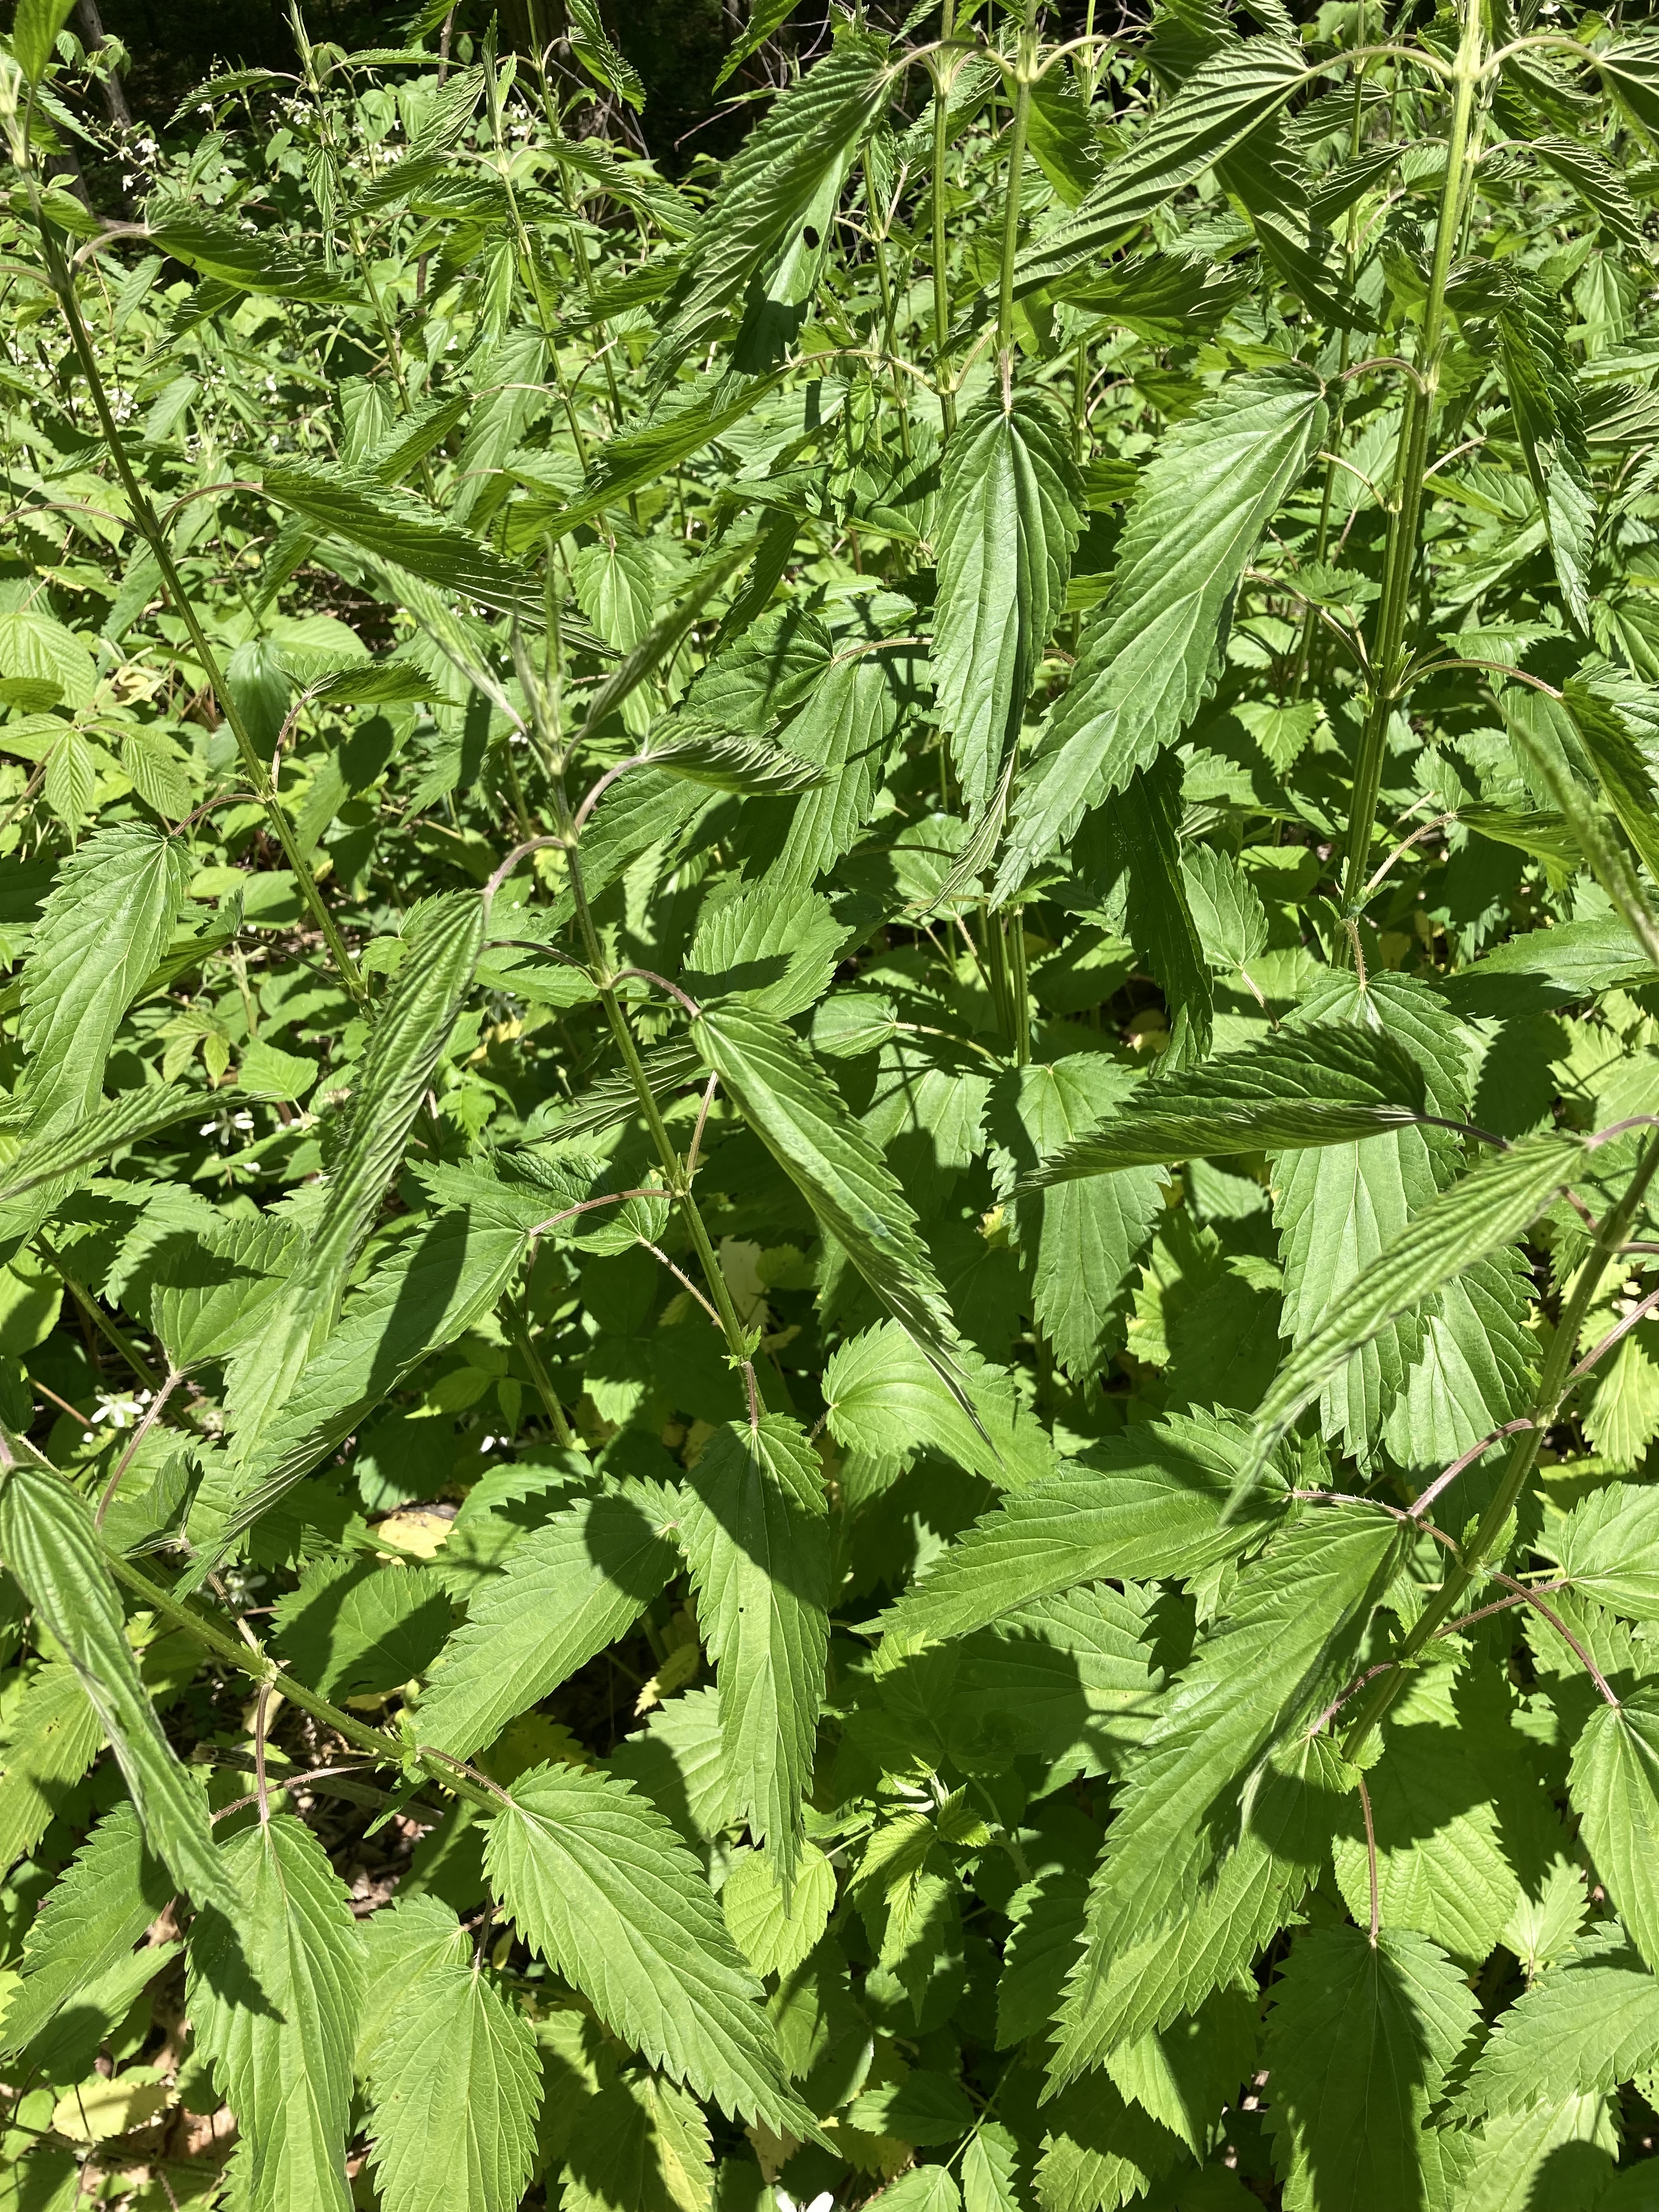
It has been pouring here on and off for about two weeks. My basil is flooded and my garlic soaked. I’m worried. My garden needs a dryout. And I’ve been dreaming of fancy outdoor grilling, but due to all this rain, it has not yet happened. I love doing a whole fish on the grill. It’s a romantic experience, and with all the herbs I’ve got growing, providing they’re not all drenched out, it can be high-end fragrant. I will get out there soon, I promise you. In the meantime, I’ve been at my oven, which is also a very good place to cook a whole fish.

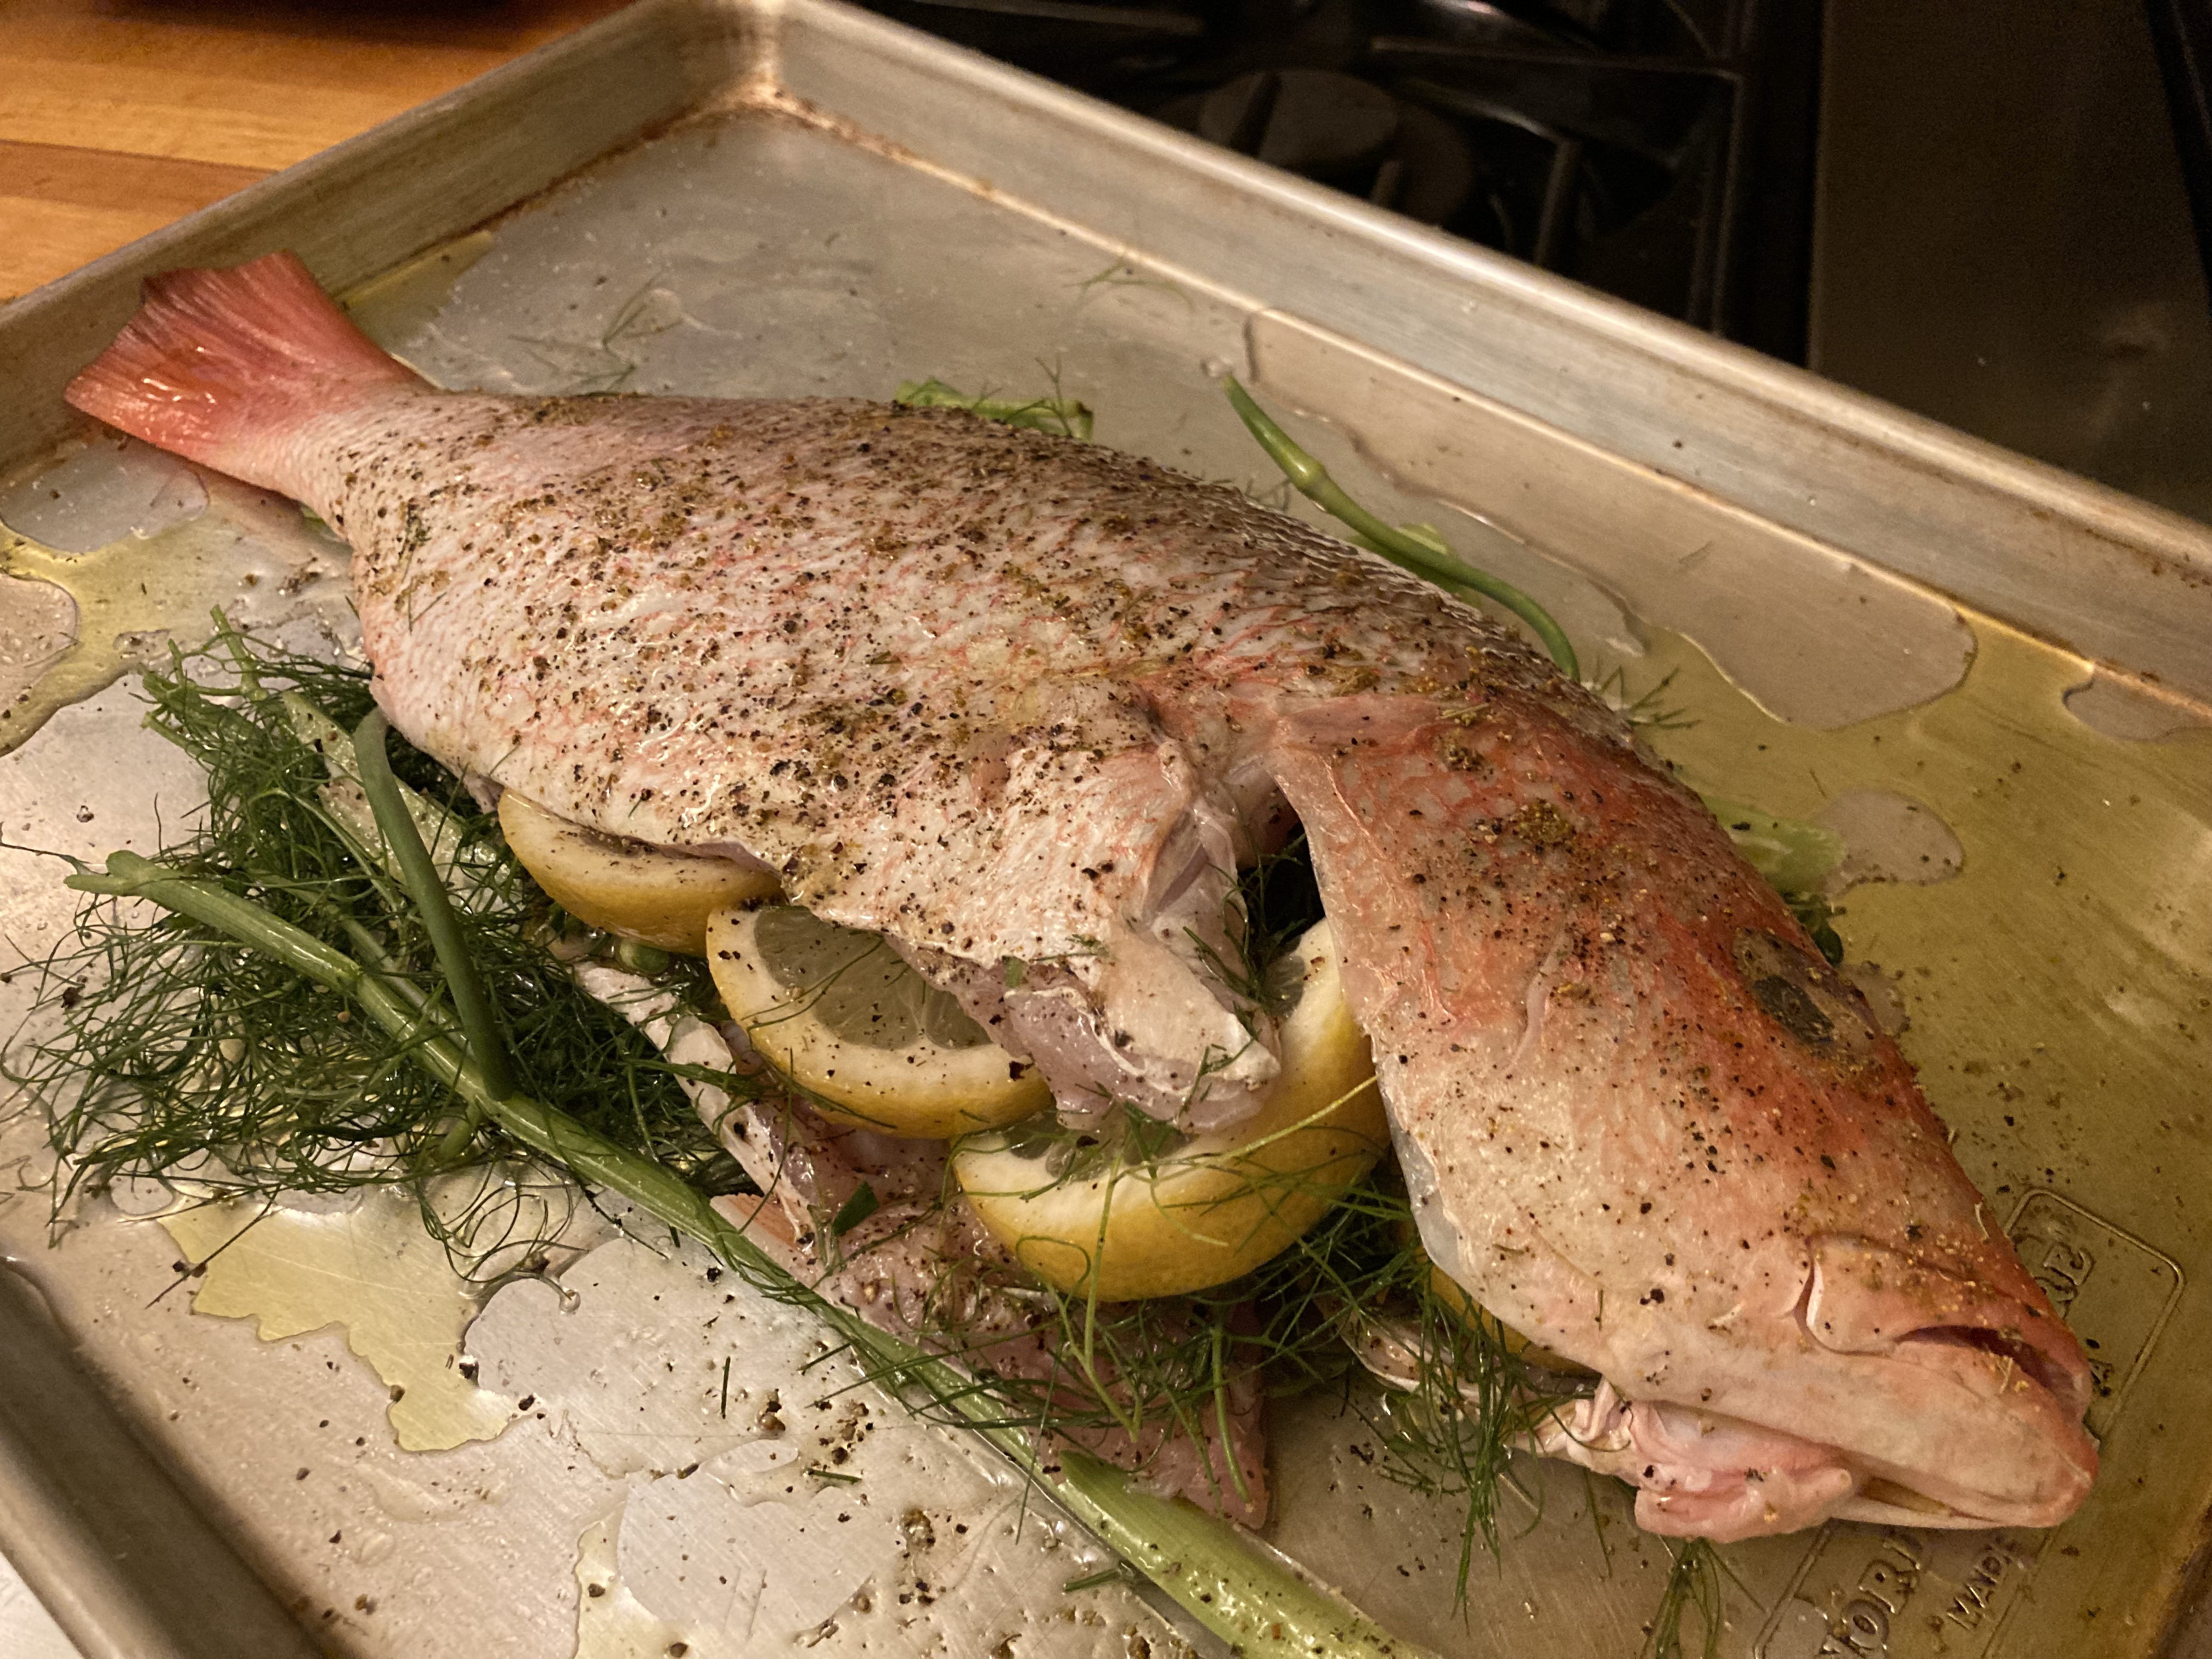
As you’ve all heard a zillion times, cooking fish whole brings out more flavor than just doing a fillet. I don’t like to beat you over the head with this, but it’s true. Everything stays contained under the skin—the fat, the natural moisture, the gelatinous stickiness from the bones, plus all the flavors you stuff inside it. I think the hesitation for most people is not knowing when the fish is cooked, but that’s not hard to gauge. I like a high-heat roast, so I’ll go with 425, even 450 degrees. My 3½ pound red snapper took about 20 minutes. I started checking after about 15 minutes by inserting a paring knife alongside the backbone to see if the meat could be lifted from the bone but stay pretty much in one piece. Once it could, the fish was ready. I didn’t let it get into “easily flaked” territory, especially since a fish will continue to cook a little after you take it out.  

I went to the market looking for my favorite little rougets (called red mullets in this country), but my fish guy at the Chelsea Market was all out. I guess I had the color red on my mind, so I instead went with a red snapper, a beautiful fish, very mild and white-fleshed. For flavoring I returned to my much-loved fennel rosemary blend, a tradition for porchetta that works well with all sorts of seafood as well. Fennel alone is, of course, classic with fish, but when you blend it with rosemary the flavor is fuller yet not overly assertive. A deep perfume develops.

Roasted Red Snapper with a Fennel Rosemary Vinaigrette

Extra-virgin olive oil
1 whole red snapper, gutted and scaled (mine was about 3½ pounds)
Salt
Black pepper
A handful of stalks from wild fennel, or 1 large bulb fennel sliced lengthwise, plus a bunch of fronds
About 10 large rosemary sprigs
2 lemons, 1 sliced into half rounds, the other cut in half
3 whole summer garlic cloves, lightly crushed
A splash of dry vermouth
A teaspoon of fennel pollen
5 or so flat-leaf parsley sprigs

Heat the oven to 425 degrees.

Get out a small sheet pan or a large roasting pan, and drizzle in some olive oil. Coat the fish well, inside and out, with olive oil, and season it with salt and black pepper. Place the fennel stalks or slices in the pan, and lay the fish on top. Stuff the fennel fronds and half of the rosemary inside the fish. Stick as many lemon rounds as you can inside. The rest place around the fish. Stick the garlic inside the fish. Drizzle the vermouth over the fish.

Put the fish in the oven.

While the fish is roasting, chop the remaining rosemary well. Put it in a small bowl, along with the fennel pollen, about ½ cup of good olive oil, and the juice from the cut lemon. Chop the parsley, and add it to the sauce. Season with salt and black pepper, and give it a good stir. Let the sauce sit to develop flavor while the fish continues to cook.

My fish took about 20 minutes, but you’ll want to check by sticking a knife in along the backbone. If the meat pulls away from the bone but stays more or less in one piece, it’s ready. You don’t want to cook it any further than that. If it’s really flaky, it’s slightly overcooked. Depending on the size of your fish, I’d start checking after 15 minutes.

Let the fish sit for about 5 minutes so it can settle. Pull the skin off, and fillet the top side, plating it. Pull out the skeleton, and lift the other side off its skin onto another plate. Take one of the garlic cloves out of the fish, and mince it. Add it to the vinaigrette, giving it a stir. Spoon the vinaigrette over the fish. Eat it right away.

What a prickly beauty. Big tail, small head. Will she ever get out without tiny, bloody scratches? I say, not likely. But artichokes are always worth the effort.

Here’s a guided tour.
Zucchini on Newspaper, by Katia Ricci.

Recipe below: Zucchini Gratin with Thyme and Goat Cheese

It seems a lot of people need help with zucchini, mostly with how to change it up from the usual pan sauté. I know I do, so when I come up with a good recipe, I want to share it with you. And if you’re growing zucchini and now have tons of it coming in all at once, you really do need help.

This is an easy gratin, but it looks kind of fancy. Good for a dinner party. I served it with huge grilled shrimp marinated in marjoram, garlic, and lemon, a nice fit but I could imagine grilled lamb or chicken kebabs just as easily.  I’m thinking the grill texture and flavor would juxtapose nicely with the gentleness of the gratin.

Happy summer cooking to you.

Zucchi Gratin with Thyme and Goat Cheese

10 medium zucchini (they will shrink up), cut into rounds
1 shallot, thinly sliced
Extra-virgin olive oil
Salt
Black pepper
1 small log (4 ounces) fresh, soft goat cheese, at room temperature
½ cup crème fraîche, at room temperature
¼ teaspoon ground nutmeg
1 small summer garlic clove, chopped
Possibly a little milk
12 big sprigs fresh thyme, lightly chopped but with flowers if it has them
¾ cup grated grana Padano cheese

Preheat the oven to 425 degrees.

Oil a large sheet pan. Lay the zucchini out on it in more or less one layer (a little overlap is fine). Scatter on the shallot, drizzle with olive oil, and season with salt and black pepper. Roast until the zucchini just starts to brown lightly at the edges, about 8 minutes or so. I find this step important for removing excess water from the zucchini. If you skip it, your gratin may wind up quite liquidy.

Put the goat cheese and crème fraîche in a food processor. Add the nutmeg and garlic, and season with salt and black pepper. Give the mixture a few pulses to blend everything. It should be thick but pourable, a bit thicker than heavy cream. If it’s too thick, add a drizzle of milk and pulse again.

Get out baking dish. I used a 11-by-8-inch Le Creuset oval, but anything more or less equivalent will work fine. Oil the inside lightly. Add half of the zucchini, spreading it out. Sprinkle on half the thyme and some grana Padano. Add the rest of the zucchini.

Pour the goat cheese cream evenly over the top, and wait for it to sink into the zucchini a little. Sprinkle on the rest of the grana and the remaining thyme. Bake, uncovered, until it’s bubbly and the top is browned, about 12 to 15 minutes.

Let the gratin cool a few minutes before serving, so it can firm up.

Herbs, by Evelina Poplian.

Recipe for a soft herb salad in the next-to-last paragraph below.

So far all my herbs look good. I knew they were starting out in that direction when in early spring my lovage came bursting out of the ground and grew huge in only three weeks. Lovage is a powerhouse herb, in growth but also in taste, like celery condensed into a speeding bullet. I use only a leaf or two when I cook a pot of beans or make a potato salad. I find it interesting that the herb I use the least of is the biggest thing in my garden. Although my fennel is also already gigantic. 

My fennel.

I planted a lot of other herbs this year too, some, like hyssop and za’atar, for this first time. They all look promising. I always lighten up when I see that my plants are starting to take. My father had the same early season gardening anxiety when he planted and tended his tomatoes. He’d be out in his garden at weird hours, chain-smoking and staring hard at the little seedlings, maybe trying to instill some fear in them. I’m not sure what his method was, but we always had good tomatoes. I go out to my herb garden and stare and worry and sometimes plead with them. It’s part of the process.

Salad burnett in my garden. It tastes like cucumber.

Up here in Dutchess County, New York, only a handful of herbs are perennial, and sometimes even the perennials get defeated by our miserable winters. But this year everything I hoped would come back did. In addition to my out-of-control lovage and fennel, all my various thymes and oreganos returned, as did my nepitella, winter savory, tarragon, sage, and borage, which is popping up all over the place. The lavender didn’t make it this year, and rosemary always gets freezer burn and needs a fresh start. That makes me sad, especially knowing how big and gorgeous those things can get in the right climate. This slate-riddled upstate soil, frozen for months each year, is obviously nothing like the Southern Mediterranean, but my Southern Italian blood pushes me to pretend it is. I just have to keep on top of things.

In the meantime, here’s something nice you can make with fresh herbs, whether you have five or six types or only a couple. It isn’t so much a recipe as a reminder that you can make a salad out of nothing but herbs. 

An herb salad from my garden, not yet dressed.

When I compose an herb salad I concentrate on leafy, soft, gentle herbs, avoiding piney, musty, and tough-stalked ones like rosemary, thyme, oregano, and sage. For this version I clipped Italian parsley, burnet, chervil, fennel fronds, a few sprigs of tarragon, and a handful of watercress, which I consider an herb. You can add arugula or sorrel, or lots of basil (my basil isn’t yet big enough to pick from). I prefer to dress an herb salad with my best olive oil, a tiny splash of rice wine vinegar, and a sprinkling of salt. I find a gentle vinegar best here, even better than lemon, which to my taste, can be too direct.

This salad is good to eat neat, but it also makes a nice, perfumed bed for something grilled, like shrimp, lamb kebab, or eggplant.

Three Peas in a Pod, Me and My Sisters Laura and Dottie, by Judy Seay.

Recipe below: Ditalini with Shell Peas, Prosciutto Cotto, Cinnamon, and Basil

Ditalini goes into pasta fazool (or pasta e fagiole in proper Italian), and in traditional Italian-American land it goes nowhere else. It’s a soup pasta. Small. Compact. Pasta e fagiole is sort of a soup, or it can be one. My family’s version was a cross between a soup and a pasta. A soupy pasta with ditalini, cannellini beans, lots of celery and onion, bay leaf, sometimes pancetta, sometimes sage, sometimes rosemary or basil, and occasionally just Italian parsley. Always hot chili flakes on the side. It was special any time of year, but especially in the winter, because it was thick and rich. And I loved ditalini, the little tubes, mixed in with the beans and the heavy broth.

It’s funny how certain pasta shapes become associated with specific dishes and then get etched in stone. When I was a kid there was linguine with clam sauce, rigatoni with meat sauce, penne with pink sauce, and ditalini with pasta fazool. That was all correct, and back then I wouldn’t have dared contradict any of it. But now I don’t think that way. I’m out of pasta prison. So here’s ditalini with fresh peas. Not so different from the bean versions, really, but the entire dish is much lighter. This one’s perfect for those lovely few weeks when spring blends into summer.

I don’t love shelling peas, but I do it because I want the peas. Also it’s nice when your fingers stain green and the kitchen smells like a mix of grass and potato (that’s how raw peas smell to me). And then you’ve got a nice pile of shells to make stock with. I like simmering a handful in a light chicken broth. I used chicken broth for this dish, but you can easily make it all-vegetable by adding the pea shells to a soffritto of onion, celery, carrot, a few leek tops, fennel trimmings, whatever you’ve got on hand.

I’ve included a little cinnamon, which I find gives the dish a bit of a Renaissance feel, or at least what I imagine would be that feel. It also deepens the sweetness of the peas. And cinnamon with basil is a beautiful combination. If you’ve ever grown the herb called cinnamon basil, which tastes and smells exactly how you’d imagine, you already know how alluring this pairing can be.

Ditalini with Shell Peas, Prosciutto Cotto, Cinnamon, and Basil

Salt
Extra-virgin olive oil
2 tablespoons unsalted butter
1 small spring onion, diced, including some of the green stem
1 medium shallot, diced
¼ teaspoon freshly ground cinnamon
1 fresh bay leaf
½ pound ditalini
1 ½ cups freshly shelled peas
A splash of white wine
¾ cup chicken broth, possibly a little more, simmered with a handful of pea shells if you like
3 thin slices prosciutto cotto, diced or cut into thin strips
About a dozen basil leaves, roughly chopped or torn
Black pepper
A small chunk of Parmigiano Reggiano cheese

Set up a pot of pasta cooking water. Add a generous amount of salt, and bring it to a boil.

While the water is coming to a boil, get out a large skillet and set it over medium heat. Add a drizzle of olive oil and the butter. When that heats up, add the onion and the shallot, the cinnamon, and the bay leaf, and let all the flavors open up for a few minutes.

Drop the ditalini in the water.

Add the peas to the skillet. Add some salt, and stir everything around to coat the peas with flavor. Add the splash of wine, and let it bubble out. Add the chicken broth, enough to just barely cover the peas. Let simmer, uncovered, until the peas are tender, about 5 minutes.

When the pasta is al dente, drain it, and pour it into a large serving bowl. Drizzle on some fresh olive oil, and give it a toss. Pour on the pea sauce, add the prosciutto cotto and the basil, and grind on a generous amount of fresh black pepper. Toss again, adding a little more chicken broth if needed to coat everything nicely.  Serve hot, adding grating Parmigiano at the table.

Nettle Sting, by Lizzie Harper.

Recipe below: Gemelli with Nettle Lemon Pesto and Mussels

The thing about stinging nettles is that they really do sting. I was surprised to learn this. I thought it was just romantic folklore. They don’t sting bad, just a little, but if you keep grabbing them without gloves, your hands will likely blow up and get red and itchy. You just need gloves, and then there’s no problem. And once the nettles are blanched their little sting is completely gone, never to come back.

The first time I ever ate stinging nettles was in Rome many years ago. They were in a beautiful jade green risotto, a little on the loose side. The taste was an earthy mix of spinach and potting soil. I loved it. I came back from that trip wondering if I could ever find nettles in New York. And I did find them, at the Union Square market in Manhattan. I tried to duplicate my Roman risotto. It came out pretty well and I was very proud of myself. And then years later, when I got my little house in upstate New York, to my astonishment I discovered a big patch of stinging nettles growing in the backyard. That was some huge excitement. Now I cook with them every spring.

My stinging nettle patch.

Stinging nettles are called ortiche in Italy. They’re most common in the middle and north of the country, where the soil is moister. Since my Roman experience, I’ve eaten ortiche several times in Liguria, usually as an ingredient in preboggion, the wild herb mix that’s used to fill pansoti, a bloated little ravioli, and other nice things, like savory torte, soup, and frittate.  I’ve recently discovered that it makes an excellent pesto.

I originally made my ortica pesto using the classic Ligurian basil pesto formula, simply replacing the basil with blanched nettles. Last night I cut back on the cheese, replaced the pine nuts with pistachios, and added a good amount of lemon zest. I tossed the resulting deep green pesto with steamed mussels and gemelli. I think another mild seafood such as scallops or trout would work just as well. You could certainly serve the nettles simply tossed with pasta, no fish, but the mussel combo was, in my opinion, a success.

I really love the color of blanched nettles. They’re a deep, almost bluish-tinged green. You’ll really notice that when you’re squeezing them dry, when lots of lovely emerald water will cascade into your sink.

Gemelli with Nettle Lemon Pesto and Mussels

For the pesto:

1 medium bouquet of stinging nettles, gathered wearing gloves (I cut them about 6 inches from the tops, stems and all)
1 spring garlic clove, chopped
¾ cup unsalted shelled pistachios
¾ cup freshly grated Parmigiano Reggiano cheese
The grated zest from one lemon
Extra-virgin olive oil
Salt
Freshly ground black pepper

For the mussels:

1½ pounds mussels, cleaned
A drizzle of extra-virgin olive oil
About ½ cup dry vermouth

Plus:

¾ pound gemelli

Still wearing your gloves, pull all the leaves off of the nettle stems. Discard the stems. Set up a pot of water, and bring it to a boil. Drop in the leaves, and blanch them for about a minute. Drain them into a colander, and run cold water over them to stop the cooking and to bring up their brilliant green color. Squeeze out as much water as you can. Aside from all the lovely green water that they’ll produce, you’ll also probably notice that the leaves feel dry, which I found to be an odd sensation.

Put the garlic and the pistachios in a food processor, and pulse until you have a rough chop. Add the nettles, Parmigiano, lemon zest, and about ⅓ cup of good olive oil. Season with salt and black pepper, and pulse until you have a smooth paste, adding more olive oil if needed to get a creamy consistency.

Put the mussels in a large pot. Drizzle them with some olive oil, and pour on the vermouth. Cover the pot, and let the heat come up a bit. Uncover the pot, and cook the mussels, stirring them around occasionally until they open. When they’re cool enough to handle, take them from their shells, and place them in a bowl. Strain the mussel cooking broth, and pour about ½ cup of it over the mussels. Cover the mussels to keep them warm.

Cook the gemelli in a large pot of salted water until it’s al dente. Drain it, saving about a cup of the cooking water. Pour the pasta into a large serving bowl. Add the mussels with their liquid. Add about half the pesto and a little of the cooking water. Give everything a good toss, adding a bit more of the pesto if needed, and subsequently a little more of the cooking water to make it creamy. Serve right away. Leftover nettle pesto is great in a frittata.

Asparagus, by Anastasiya Kharchenko.

Recipe below: Asparagus with Anchovy Parmigiano Breadcrumbs

For many people asparagus tastes like grass. Like grass but sweet. I guess I’d somewhat agree, but what does this even mean exactly? Fresh mown grass, or cooked grass? Lawn grass or wild grass? Grassy is something people say when trying to describe the tastes of many green vegetables. It’s sort of like when people say that cheeses or mushrooms or dairy products taste nutty. I’ve even heard people say that particular nuts, almonds for instance, taste nutty. Which means I guess, that they taste likes other nuts, and that all nuts taste similar—which they don’t. Describing the taste of food is hard. Food writers struggle with it all the time. The frustrating thing is that you can’t convey a taste without comparing it to something else. How do you get around that? This spring I’ve been trying to concentrate on the taste and smell of asparagus. It’s hard. I mean green asparagus, not white or purple, which are variations I don’t find at spring farm stands. Raw asparagus has no smell, and its taste registers only a faint sweet bitterness for me. But cooking it brings out all kinds of tastes. Grassy? Maybe. But for me, I now realize, asparagus tastes like a cross between artichoke and broccoli. I’ve settled in on that description for now.

Asparagus, Pecorino and Crackers, by Amy Weiskopf.

And what about asparagus pee? That aroma is really something special. I look forward to it every spring. It never fails me. It’s asparagusic acid that causes it, a chemical unique to asparagus and commented on since the dawn of the vegetable. The acid gets broken down in your gut into sulfur. Sulfur itself can smell disgusting, as in heavily cabbage-laced fart, but to me asparagus sulfur isn’t nasty. It’s a kind of sweet sulfur. It’s a marker of spring for me. And did you know that about 30 percent of people can’t smell their asparagus pee? The medical explanation for this is that some people break sulfur down better than others, leaving little left to smell. I have another theory: Some people just smell things better than others. I think I’m a super smeller.

Penne Asparagus, by Patti Zeigler.

Asparagus with Anchovy Parmigiana Breadcrumbs

1 large bunch medium-thick spring asparagus (1 pound or a little more), the tough ends trimmed
Extra-virgin olive oil
2 tablespoons unsalted butter
5 or 6 oil-packed anchovies, minced
1 small clove fresh spring garlic, minced
¾ cup panko breadcrumbs
¾ cup freshly grated Parmigiano Reggiano cheese
½ teaspoon sugar
The grated zest and juice from 1 medium lemon
8 or so large thyme sprigs, the leaves lightly chopped
Salt
Freshly ground black pepper

Blanch the asparagus in a pot of boiling water for 3 to 4 minutes, depending on its thickness. You’ll want it left a bit crunchy, since it will briefly cook again in the oven. Scoop the asparagus from the water into a bowl of ice water to cool it and bring up its green color. Drain it well on paper towels.

Preheat the oven to 450 degrees.

In a medium skillet, heat a tablespoon of olive oil and the butter over medium-low heat. Add the anchovies and the garlic and briefly let them melt and release their flavors into the oils. Turn off the heat, and add the breadcrumbs, the Parmigiano, the sugar, the lemon zest (but not the juice just yet), and the thyme, seasoning with salt and black pepper. Mix everything well. The crumbs should be moist. If they seem dry, add a little more olive oil.

Place the asparagus spears in a baking dish with enough room to spread out a bit. Some overlap is fine. Drizzle them with a little olive oil, the lemon juice, and some salt, turning them around in it to coat them lightly.  Sprinkle the breadcrumb mix more or less evenly over the asparagus, leaving the tips and bottoms free from crumbs. Bake until the crumbs are golden and crisp, about 8 minutes or so. Serve hot or warm.

Morelscapes by Don Huber

Recipe below: Braised Chicken with Morels, Tarragon, and Thyme

Last night we had a thunderstorm that lasted for more than an hour. It was the low rumbling kind but with hardly any lightning, so the night sky remained dark. The rain wasn’t heavy, which was a good thing, as in a heavy rain we often lose power and I wasn’t in the mood for that (sometimes I am). I sat in bed with the cats, listening to the entire show. The cats weren’t scared, but they were upright and alert, with big eyes. A storm like this one, without lightning, is odd to sit through, but it let my head wander to thoughts of spring food, of everything I was eager to cook again. I focused on morels, with their honeycomb weenie caps, dry texture, and hollow insides.

Yesterday I had gone out looking for morels, searching in the correct places, around the moist, decaying crud that builds up under elms, ash, and old apple trees. I’ve had this house in the Hudson Valley for seven years. Every April when morel season starts, I go a little apeshit looking for them, but I’ve never found any. A neighbor, Larry, brought me about a dozen huge ones several years ago, all about six inches long, that he found somewhere around here. He wouldn’t say where. I wasn’t furious with him, but I was definitely irritated, and he knew it. I sliced them all in half, lengthwise, checking for bugs, which are common in these mushrooms, but I didn’t find any, so I just quickly sautéed his mega morels in butter and splashed them with grappa. That is one of the best ways to bring out their earth flavor. And just so you know, you don’t want to eat them raw; their toxins need to be heated out and away.

Today, after last night’s rain, I figured I’d go out again, looking. But it’s still raining, so I guess I’ll wait until later, when things dry out a bit.

In the meantime I want to share with you a very good recipe for chicken with dish that I made the other night with morels I had bought at Eataly for $55 a pound. I swear that was the price. I bought exactly ten of them, and the bill came to $12. I justified the expense by telling myself that at least I didn’t get the golden morels, the lighter ones piled up next to the run-of-the-mill ones I did buy. Those were going for $85 a pound. I have a love-hate relationship with that store.

This recipe is a pretty straightforward braise. Morels, chicken, and tarragon are a classic French trio, but I decided to strengthen it by adding thyme at the beginning of cooking, as an underpinning, and then introducing the tarragon right at the end, so it wouldn’t lose any of its potency. I was really happy with the result, and it produced lots of rich, earthy sauce to flavor rice I served with it.

Morel season is just beginning up here, and I’ll continue to scout around, like I always do. I don’t have high hopes for success, but you never know. I might get lucky. I’ll keep you posted.

Braised Chicken with Morels, Tarragon, and Thyme

½ cup all-purpose flour
Salt
Black pepper
½ teaspoon ground allspice
½ teaspoon ground coriander seed
8 chicken thighs, including their bone and skin, or a mix of thighs and drumsticks
Extra-virgin olive oil
2 tablespoons unsalted butter
1 large shallot, finely diced
A dozen or more morels, cut in half lengthwise (and don’t forget to check for bugs)
6 large thyme sprigs, the leaves chopped
A big splash of cognac or brandy
A small glass of dry vermouth
1 cup good-quality chicken broth
1 heaping tablespoon crème fraîche
About 8 large tarragon sprigs, the leaves chopped

Pour the flour out onto a plate. Add salt, black pepper, and the allspice and coriander seed, mixing everything together.

Dry off the chicken pieces, and season them with a little salt and black pepper. Coat them all lightly with the seasoned flour.

Get out a large skillet, and set it over medium high heat. Add a drizzle of olive oil and the butter, and let it heat up. Add the chicken, skin side down, and let it cook without moving it around until it’s well browned and about halfway cooked through, probably around  6 or 7 minutes. You may need to turn the heat down a bit if it’s browning too quickly. Next flip the chicken over, and cook it until it’s just tender with a touch of pink at the bone, about another 6 minutes. Take the chicken out of the pan and place it on a plate, skin side up. Pour off some, but not all, of the pan fat.

Add the shallot, morels, and thyme, and season with salt and black pepper. Sauté until the mushrooms have softened some and start giving off a nice earthy fragrance. Splash on the cognac, and let it boil away. Add the vermouth, and let it bubble for a few seconds. Add the chicken broth. Turn the heat to medium low, and simmer for about 5 minutes to lightly reduce the sauce. Add the crème fraîche, stirring it in, and let it simmer and blend in.

Return the chicken to the pan, skin side up. Scatter on the tarragon, and heat the chicken through over a low flame, spooning some of the sauce on it and letting the whole thing come together, about another five minutes. Check for seasoning, and serve hot.

You’ll have a rich sauce, so you’ll best serve the dish with something that will soak it up, like plain rice or orzo.

Women with Fish

I think it’s important to look well groomed and neat. I like to feel clean even if I’m not clean.