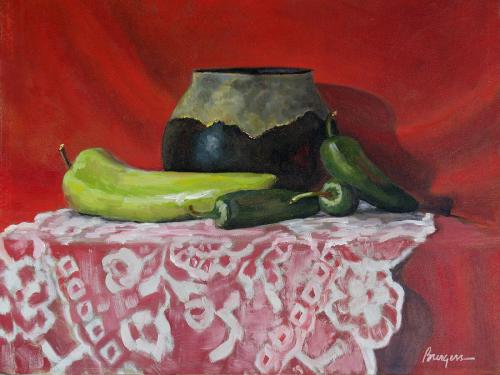
Still Life with Green Peppers, by Keith Burgess.
Recipe below: Roasted Green Peppers with Merguez, Rice, and Ricotta Salata, Served with a Quick Tomato Salsa
Sweet green peppers are for me a defining aroma of an Italian-American household. I like to think that means I was a well cared-for child. In terms of feeding, I certainly was. The rest was a crapshoot, but we sure had great food, and lots of it. When I cook up green peppers now, in my own home, their presence produces a bittersweet pang of the heart.
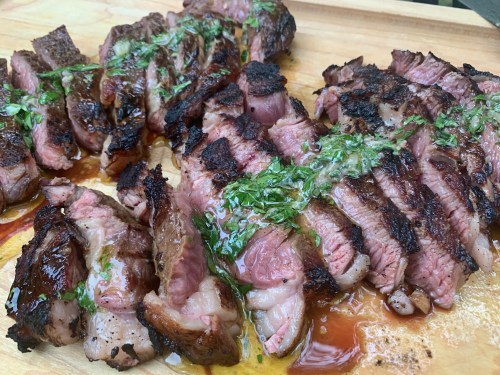
Peppers were a serious part of my father’s little garden. He loved to throw them on the grill until blistered, but he also roasted them along with onions and then mixed them in with sausages for our version of San Gennaro feast food. For grilling we used green bells; for the sausage combo we bought the long, lighter ones we called Italian frying peppers, also known as cubanelle in the Latino community. But my favorite way with green peppers is to stuff and roast them. That was my mother’s way, making a summer dish, but a rather compact one. Some type of ground meat, rice, pecorino, garlic, wine, and herbs all went in, a tomato sauce was made, and the whole was served slightly crusted at the edges. The things were small but powerful. And filling, too, an ideal way to bring a family together at the table.
Green peppers have a different character from the riper red ones, a little sour, harsh even. I’m not crazy about their raw taste, but grilling or roasting makes them fragrant and soft, not sweet but still retaining the edge that makes them so good with assertive herbs and spices. You’ll want a glass of Montepulciano d’Abruzzo with them, and good bread for all the oily, winey juices.

Roasted Green Peppers with Merguez, Rice, and Ricotta Salata, Served with a Quick Tomato Salsa
(Serves 4)
For the tomato sauce:
Extra-virgin olive oil
1 small shallot, cut into small dice
1 large summer garlic clove, thinly sliced
4 big round summer tomatoes, chopped and drained
Salt
A few big sprigs of thyme, the leaves chopped
Black pepper
A few drops of balsamic vinegar
For the peppers:
4 green bell peppers
Extra-virgin olive oil
Salt
Black pepper
1 large shallot, finely chopped
1 small inner celery stalk, diced
1 large summer garlic clove, thinly sliced
¾ pound merguez sausage, the skin removed and the meat crumbled
1 3/4 cups cooked long-grain rice
5 or 6 thyme sprigs, the leaves chopped
2 rosemary sprigs, the leaves chopped, plus a bunch of small sprigs for garnish
½ teaspoon freshly ground allspice
Aleppo pepper to taste
A palmful of pine nuts, lightly toasted
½ pound ricotta salata, crumbled
½ cup dry vermouth
½ cup chicken broth
Preheat the oven to 425 degrees.
Make the tomato sauce: Take out a medium skillet, and get in hot over medium-high heat. Drizzle in about a tablespoon of olive oil. Add the shallot, and let it soften for a few minutes. Add the garlic, and sauté until fragrant, about 30 seconds or so. Add the tomatoes, and cook them quickly, uncovered, just to take off their raw edge, about 3 minutes. Season with salt, black pepper, and the thyme. Add a few drops of balsamic vinegar, and turn off the heat. Add the drizzle of fresh olive oil, and stir it in.
Slice the peppers in half lengthwise, keeping the stems if possible (maybe slicing through those, too, if that’s not too difficult). Remove the seeds and inner ribs. Place the peppers, cut side up, on a sheet pan. Drizzle them all over with olive oil, and season their insides with salt and black pepper. Roast until fragrant and about halfway cooked, about 20 minutes. Take them from the oven, and let them sit to cool off a bit. You’ll notice that a little liquid has pooled up inside them. That is good. Leave it. It will add flavor to the stuffing.
Get out a baking dish that will hold all the peppers fairly snuggly. Drizzle a little olive oil into it, and smear the oil around.
In a large skillet, heat about 2 tablespoons of olive oil over medium heat. Add the shallot and celery, and sauté until fragrant and tender, about 3 minutes. Add the garlic and the merguez, and brown lightly. Add the rice. Season with thyme, rosemary, allspice, salt, and a little Aleppo. Sauté everything until well mixed and fragrant, about a minute or so. Take the skillet off the heat, and let it cool for a few minutes. Now add the pine nuts, the ricotta salata, and a drizzle of fresh olive oil, mixing everything well.
Fill the peppers with the mix, and place them in the baking dish, fiilling side up. Mix the vermouth and the chicken broth together in a little bowl, adding a good drizzle of olive oil. Pour it over and around the peppers.
Bake uncovered until the peppers are very tender but still holding their shape, 30 minutes or so. Garnish the peppers with rosemary sprigs, and serve them with a good spoonful of the tomato sauce on top (or over to the side a bit), reheating them if you like.