
A Sleepless night and my head emerged like this. Creepy but happy.
Posted in Uncategorized on September 1, 2023| Leave a Comment »
Posted in Uncategorized on August 27, 2023| 6 Comments »
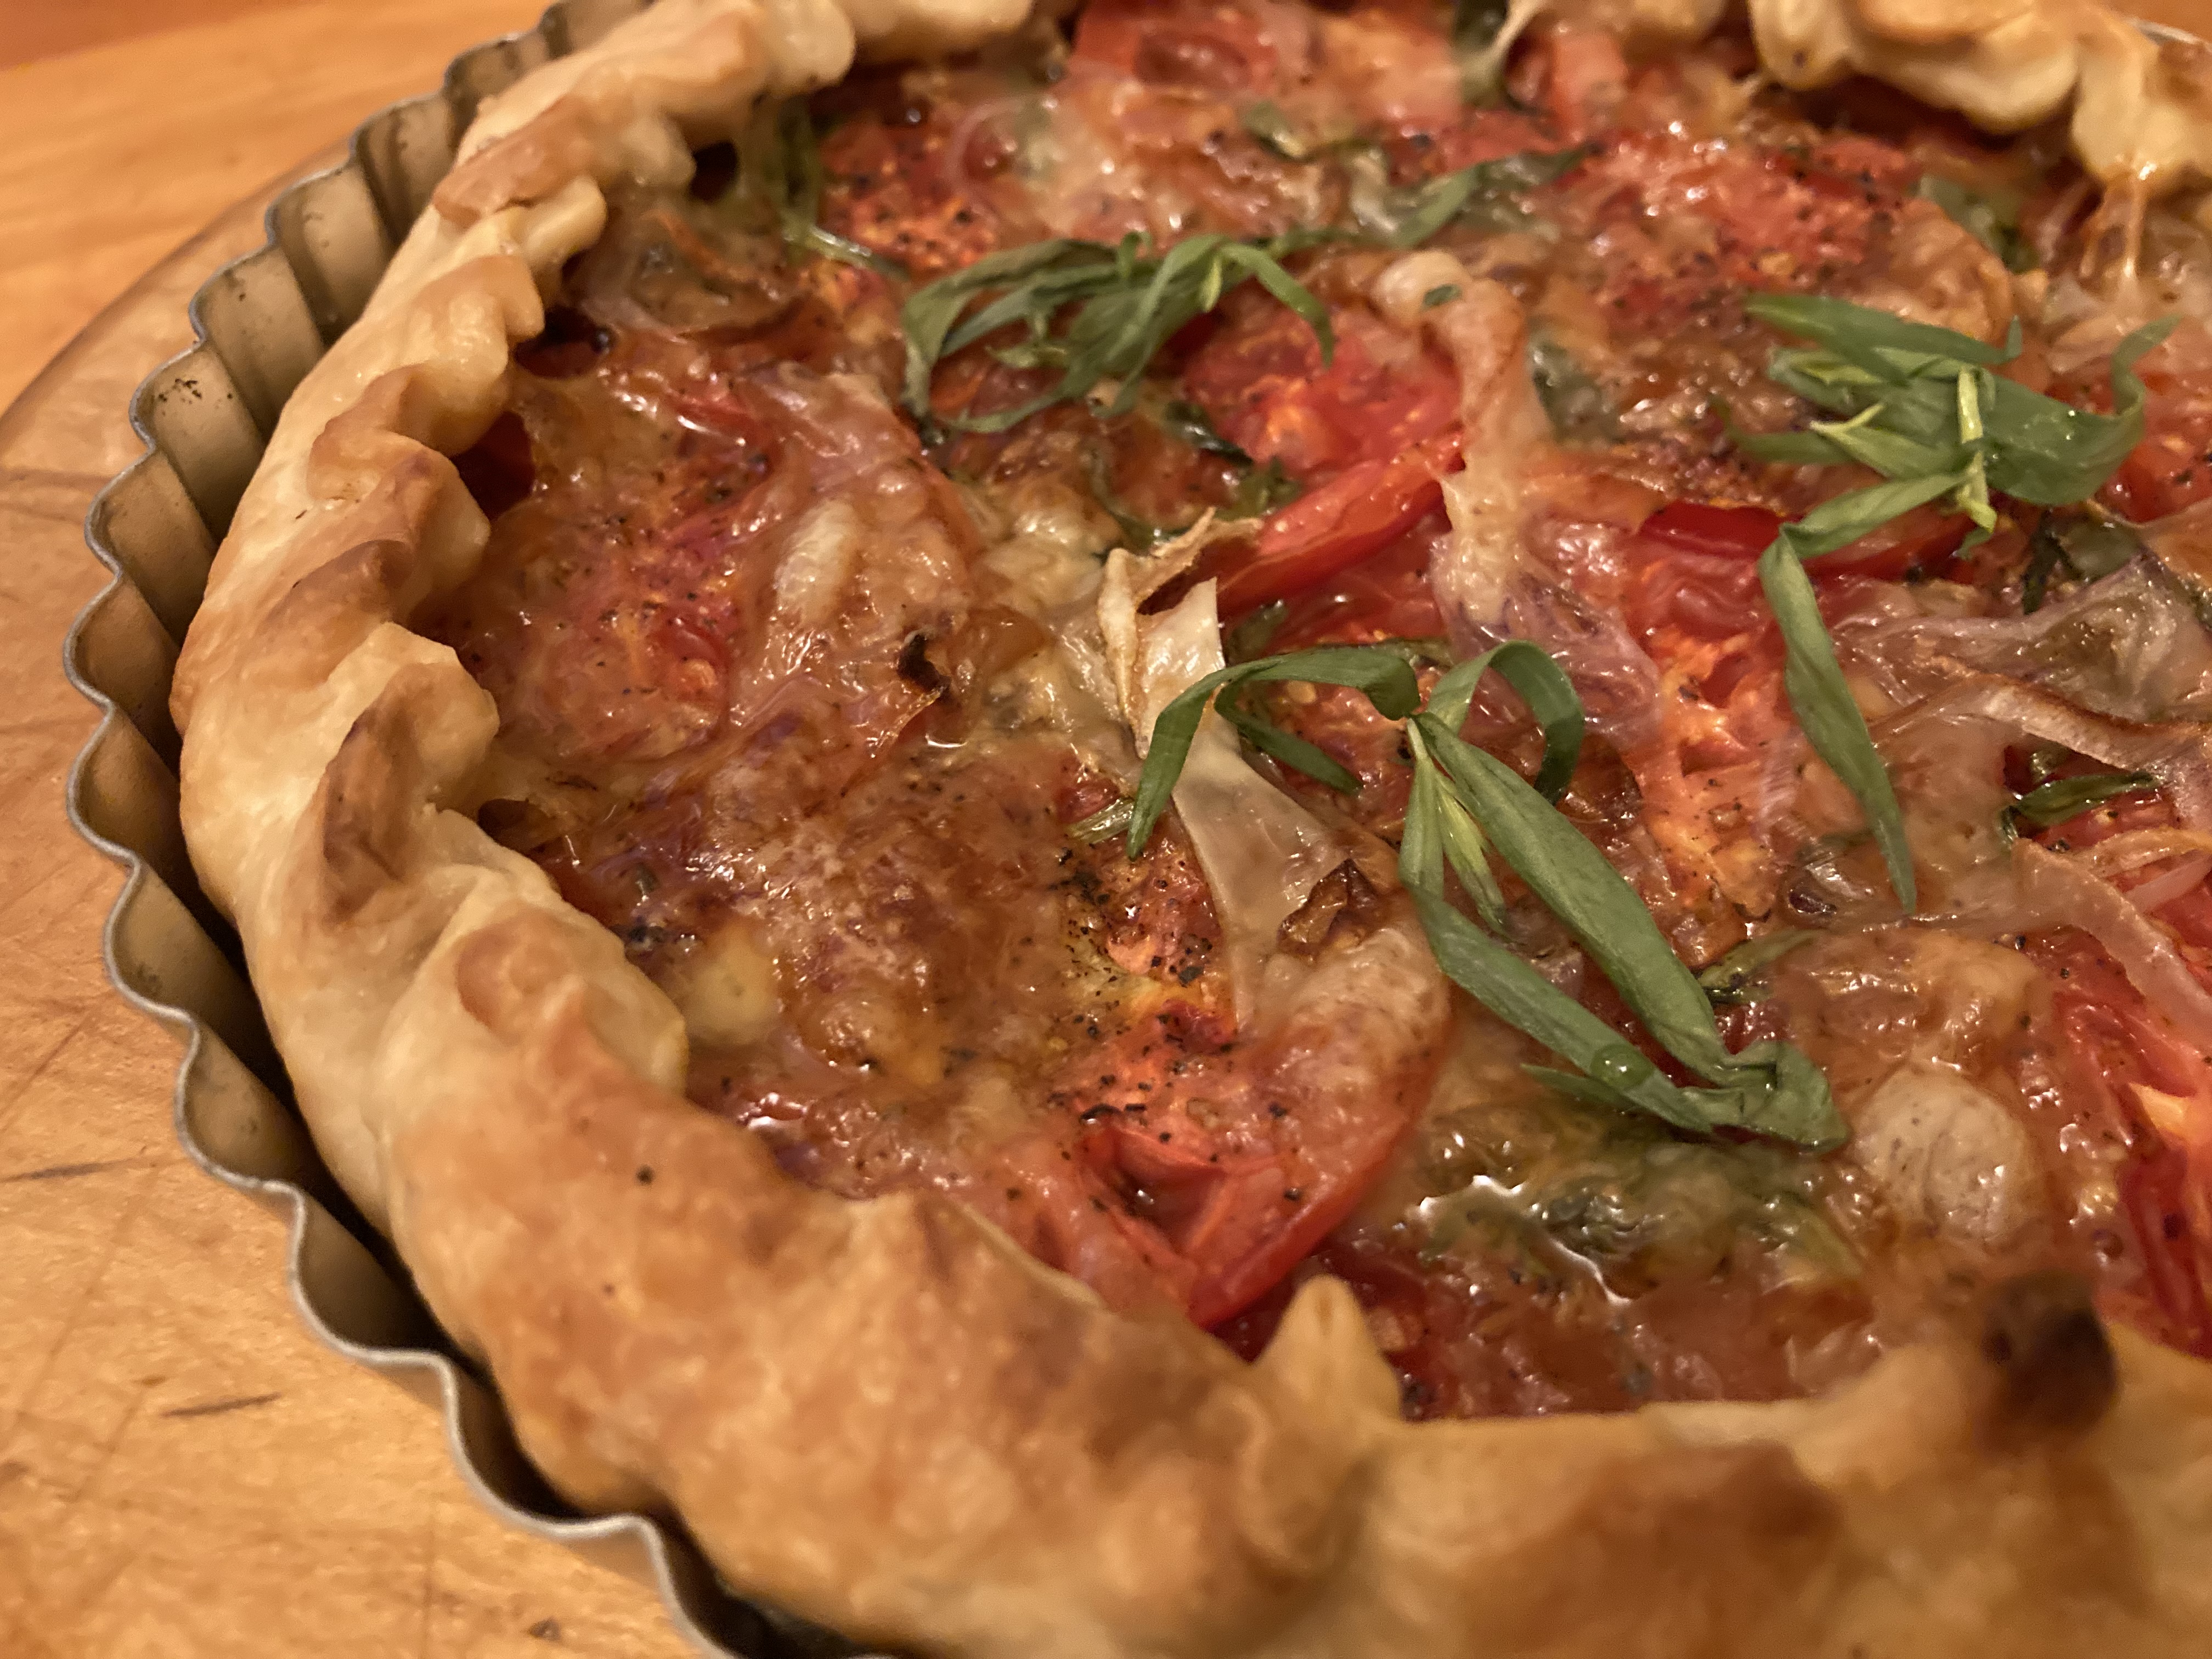
Recipe below: Summer Tomato Tart with Tarragon and Fontina
An incident involving summer tomatoes has stayed with me for more than 50 years. One summer in the early seventies, my sister and I decided we wanted to have a party. The theme would be hits of the 1950s. We didn’t really know that music, but we sensed that its danceable rhythms would get the party moving. And the outfits—ponytails, bobby socks, saddle shoes—were a big draw.
We went to our local record store in search of 45s. The guy behind the counter was of that era and steered us immediately to what we needed. “Whole Lotta Shakin’ Goin’ On,” “Tutti Frutti,” “Peggy Sue,” “A Teenager in Love,” “Blueberry Hill,” “Lollipop,” “Rock Around the Clock,” “Wake Up Little Susie,” “Shake, Rattle and Roll.” A song called “Patricia,” by Pérez Prado, became my favorite. We were in business. We set up a string of lights in our little backyard, got our dopey outfits together, and let it be known this was happening.
My parents were okay with the party, but my father had one important thing to say: “Don’t let those kids near my tomatoes.” He was in love with his tomato garden. He nurtured the plants, talked to them, touched them. He was out there at odd hours, checking, worrying, smoking cigarettes, watering, looking for bugs. We promised him nobody would touch his red August tomatoes.
So many people showed up for our party, it was actually a little frightening, but we kept cool and got the music on and the Yago sangria flowing. The throb and sweat of all those people dancing in our backyard in the August heat became, I thought, a thing of greatness. But as the party progressed, it turned raucous. I saw people head for the tomato garden, and there a sort of phony tough guy fight broke out. There was stupid drunken yelling. And then I saw tomatoes flying, tomatoes smashed on the patio, ripe tomatoes all over the backyard. A sickness came over me. My father, who must have been watching out the kitchen window, raced out in his boxer shorts, screaming. The party was immediately over, the backyard cleared out. My sister and I stared at the destruction in silence. My father stood shaking his head. My guilt and sadness were profound. I cried that night, and I cried the next couple of nights. I still think about my father and those smashed tomatoes at least once every summer, and even now, so long ago, my father now gone, I feel remorse.
I now grow my own tomatoes. I can’t say I’m as intensely involved with them as my father was, but I treat them with the utmost respect, and I hope they’re happy. If you’ve got beautiful summer tomatoes, here’s a good thing to make with them.
You’ll want a 9-inch tart pan with a removable bottom. You can make this without a tart pan, just laying the dough out on a sheet tray, but I like how the tart pan gives it more structure.
For the crust:
2 cups all-purpose flour
½ teaspoon salt
1 teaspoon sugar
¼ cup extra-virgin olive oil
⅓ cup dry vermouth
For the filling:
Extra-virgin olive oil
1 teaspoon Dijon mustard
1 small shallot, thinly sliced
About 5 medium, round summer tomatoes, sliced into approximately ¼-inch-thick rounds and set on paper towels to drain off some moisture (any color tomatoes or mix or colors will work; I used medium-size round red ones, but large cherries would be good, too, thought you’d need more of them)
Salt
Freshly ground black pepper
8 large sprigs tarragon, the leaves lightly chopped
A small wedge of Fontina Val d’Aosta cheese
1 teaspoon runny honey
To make the crust, put the flour in a food processor. Add the salt and sugar, and give it a few pulses. Drizzle in the olive oil and the vermouth, and pulse until you have a moist but still crumbly mass. The dough should stick together when you pinch a bit of it. If it still seems dry, add a tiny drizzle more of vermouth and pulse again. Don’t let it form a ball. You just want a moist crumble. Turn the dough out onto a work surface, and press it together into a ball. Give it a few quick kneads to make it smooth, and wrap it in plastic. Let it sit, unrefrigerated, for about an hour before rolling so it can relax a bit.
Preheat the oven to 425 degrees.
Lightly oil your tart pan.
Roll out the dough. With this olive oil dough you don’t need extra flour for rolling. It doesn’t stick to the work surface. Make a more or less round shape that’s about 2 inches larger than your pan. Drape it into the pan, pressing it down a bit. The dough will be quite rubbery and have a tendency to spring back. Brush the inside of the dough with the mustard. Scatter the shallot on the dough. Arrange the tomatoes over the shallot in a tight single layer. Season with salt and black pepper, and drizzle on a little olive oil.
Scatter on the tarragon, and, with a vegetable peeler, shave about ½ cup of the Fontina over the top. Drizzle on the honey.
Trim the overhang so you have a more or less even 1-inch hanging rim of dough. Fold the overhang in toward the middle of the tart, making little little folds all around (see the photo above).
Bake for about 30 minutes. The crust should be browned, the tomatoes softened, and the cheese melted and lightly golden. Let sit about 20 minutes before slicing.
Posted in Uncategorized on August 16, 2023| Leave a Comment »
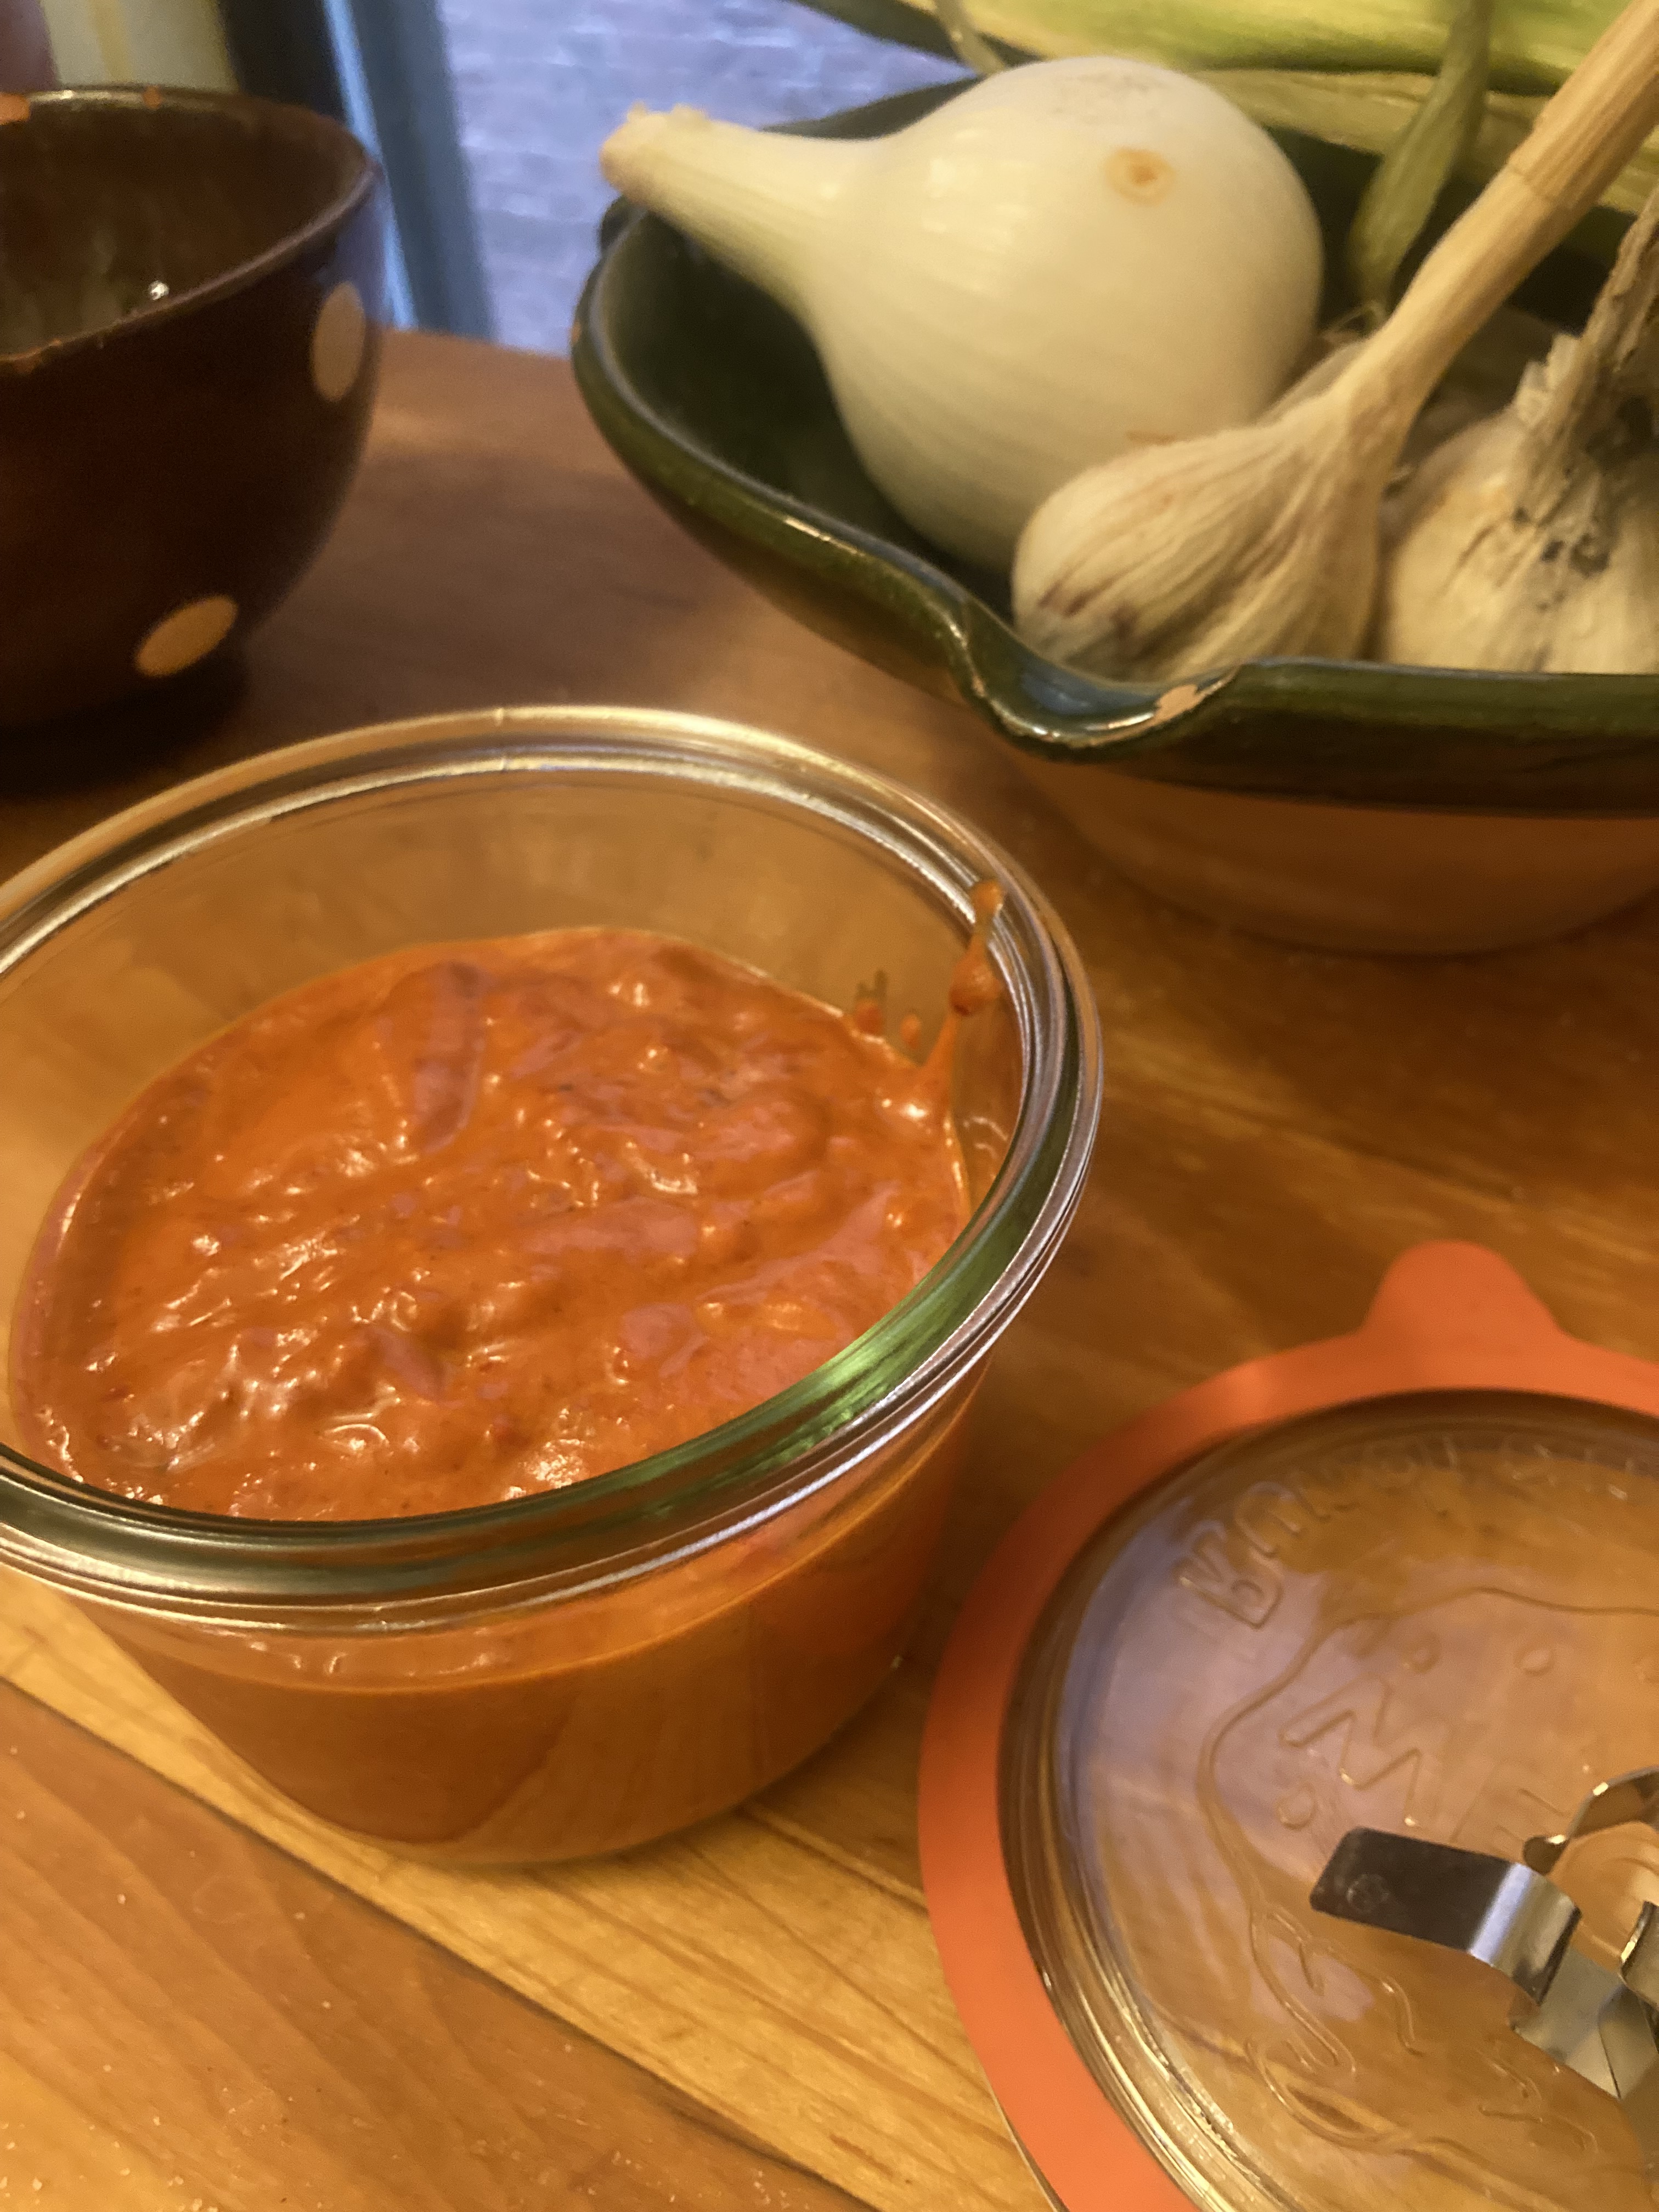
Recipe below (in text): Fresh Espelette Salsa with Thyme Vinegar and Allspice
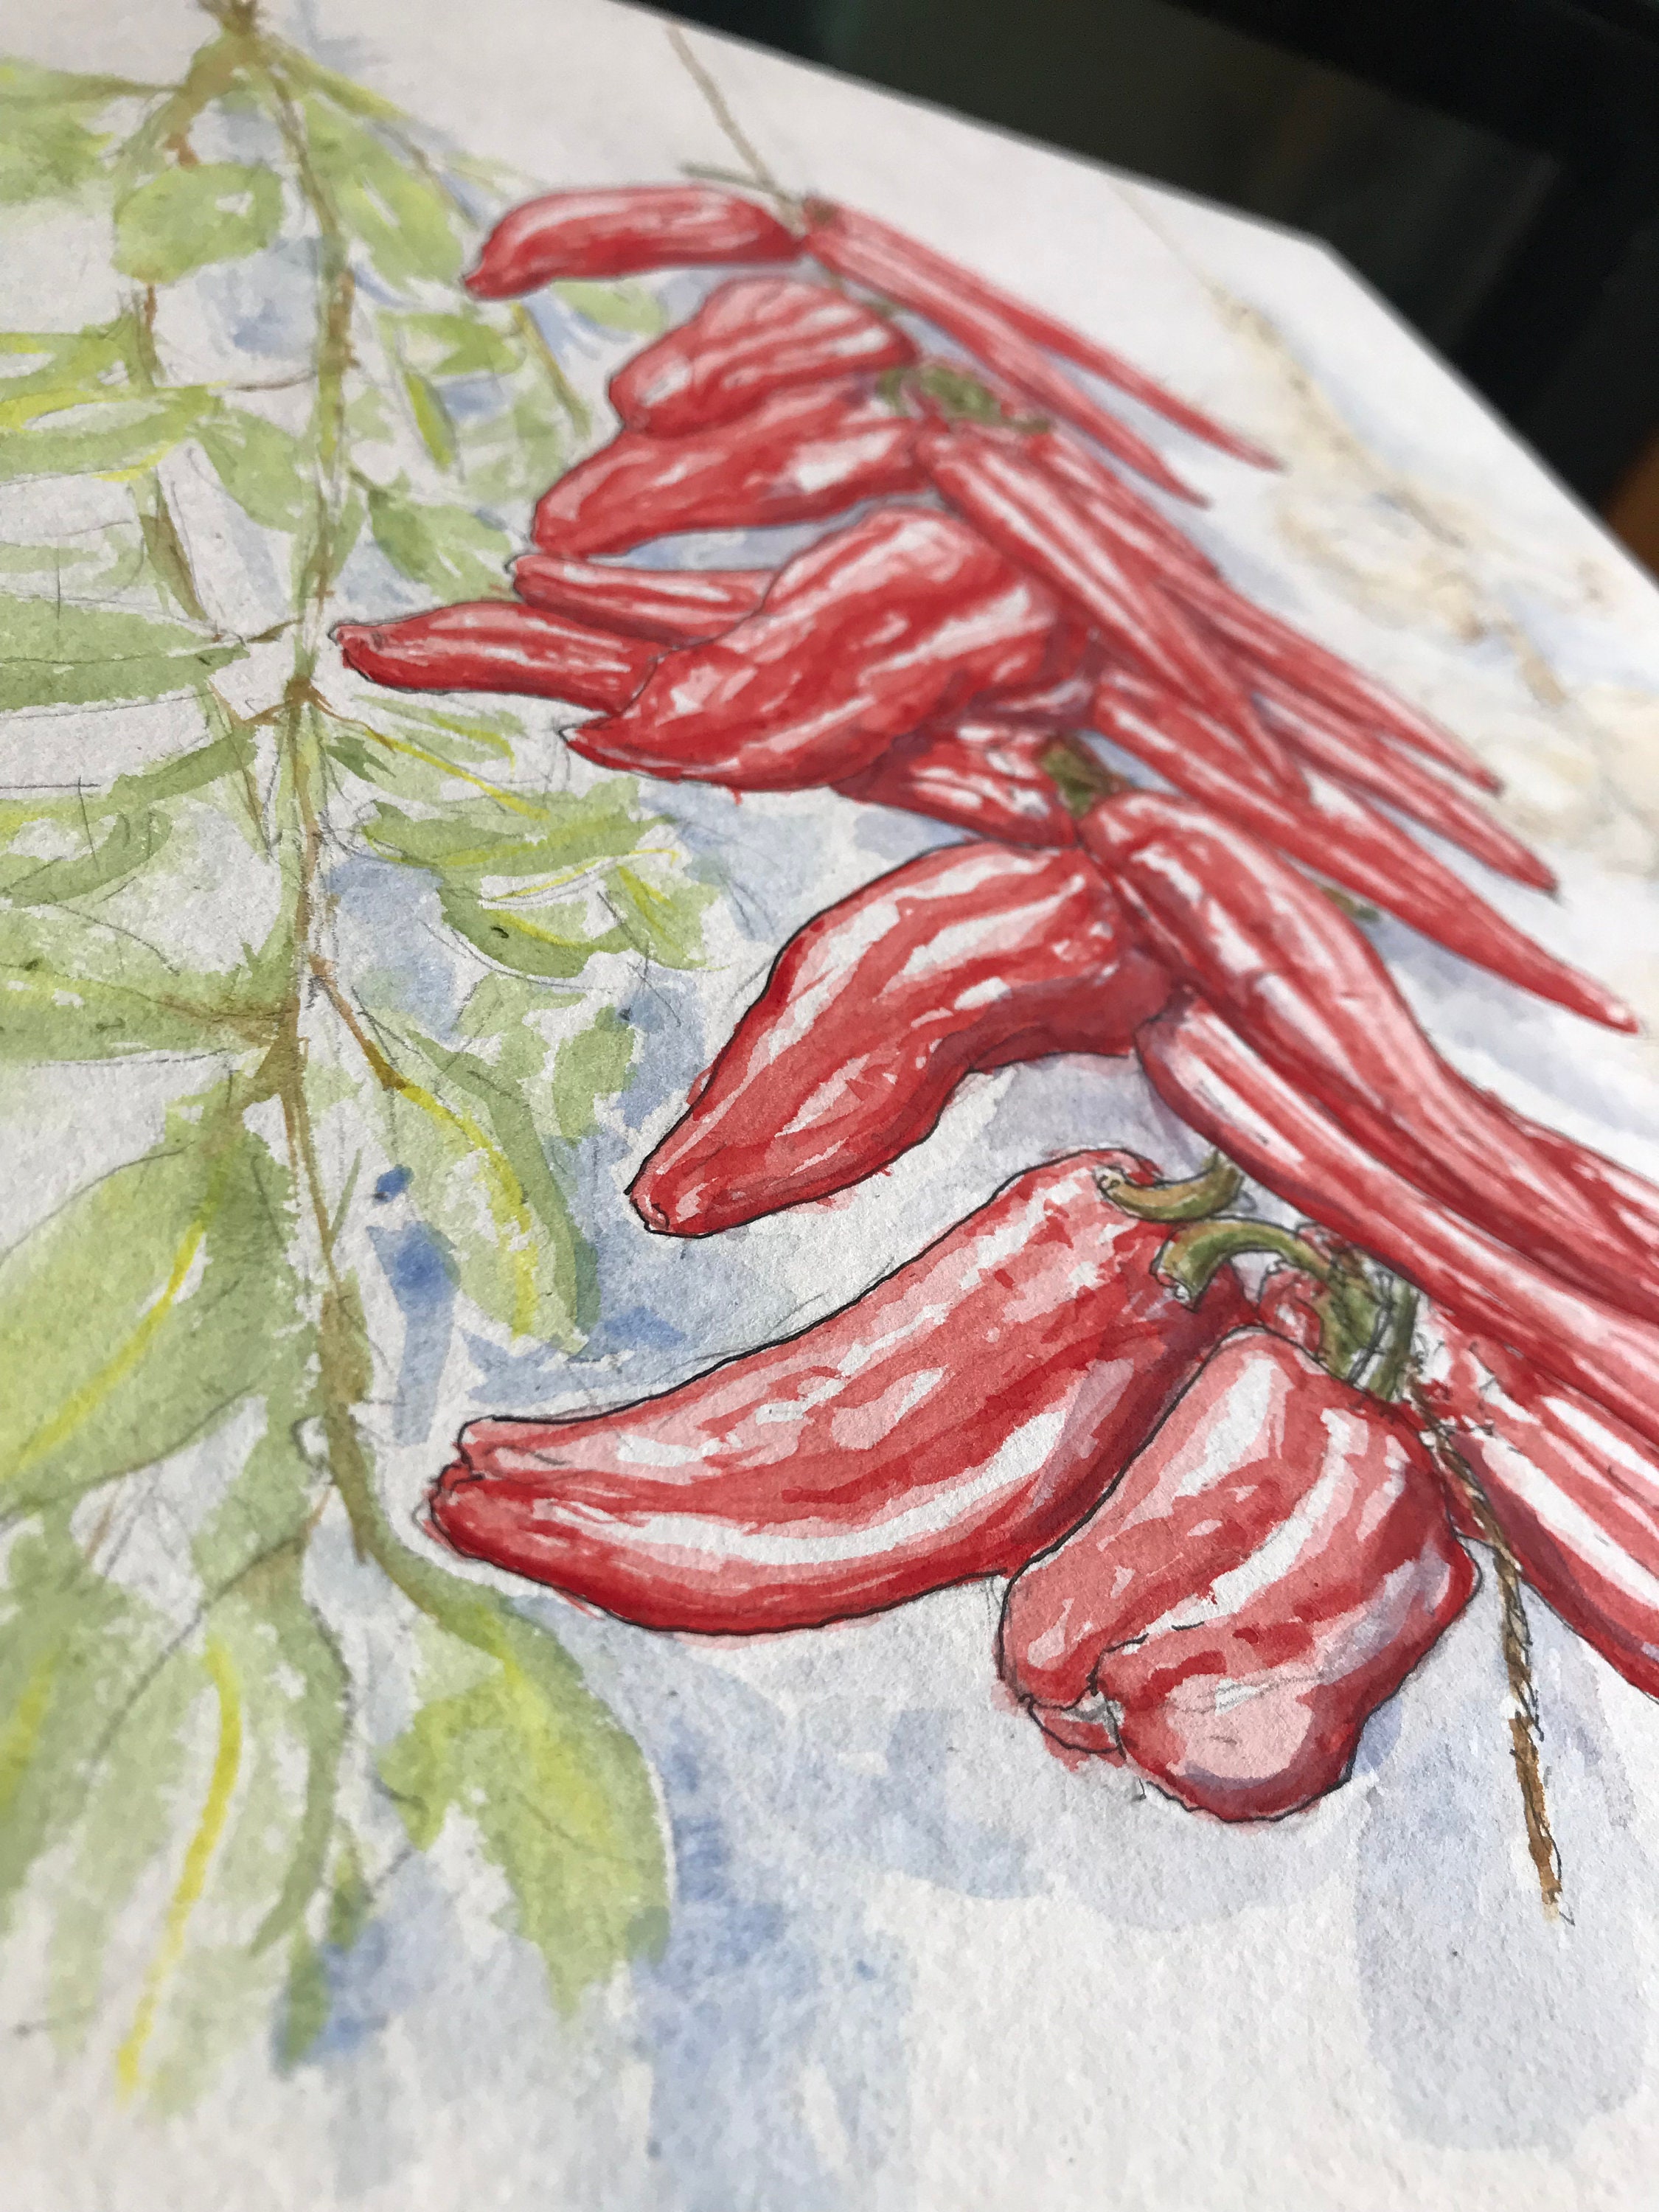
I’m growing espelette chilis in my garden this year. They are traditional Basque chilis mainly used dried to produce piment d’Espelette, a sweet and moderately spicy paprika. So far mine are runty and green. Maybe they don’t like upstate New York weather. Considering that it’s already mid-August, I’m not sure they’ll ripen before the first frost. That’s pretty sad. But when I went over to the Union Square Greenmarket the other day, there were bins of espelettes, deep red, shiny, smelling sweet but with that touch of raw spice that glows forth even before you cut into one. Those were from South Jersey. I guess they like it there better.
The espelette pepper at peak ripeness is an amazing color that appeals to me like few others. It’s not a fire engine red, but not dark ruby either, and nothing like a blood-red beet. It’s something in between, closer to the best lipstick shade for me and many Italian American types, and it might be described as rich red. I have synesthesia, and deeply pigmented red has always been the number five for me. This color screams five.
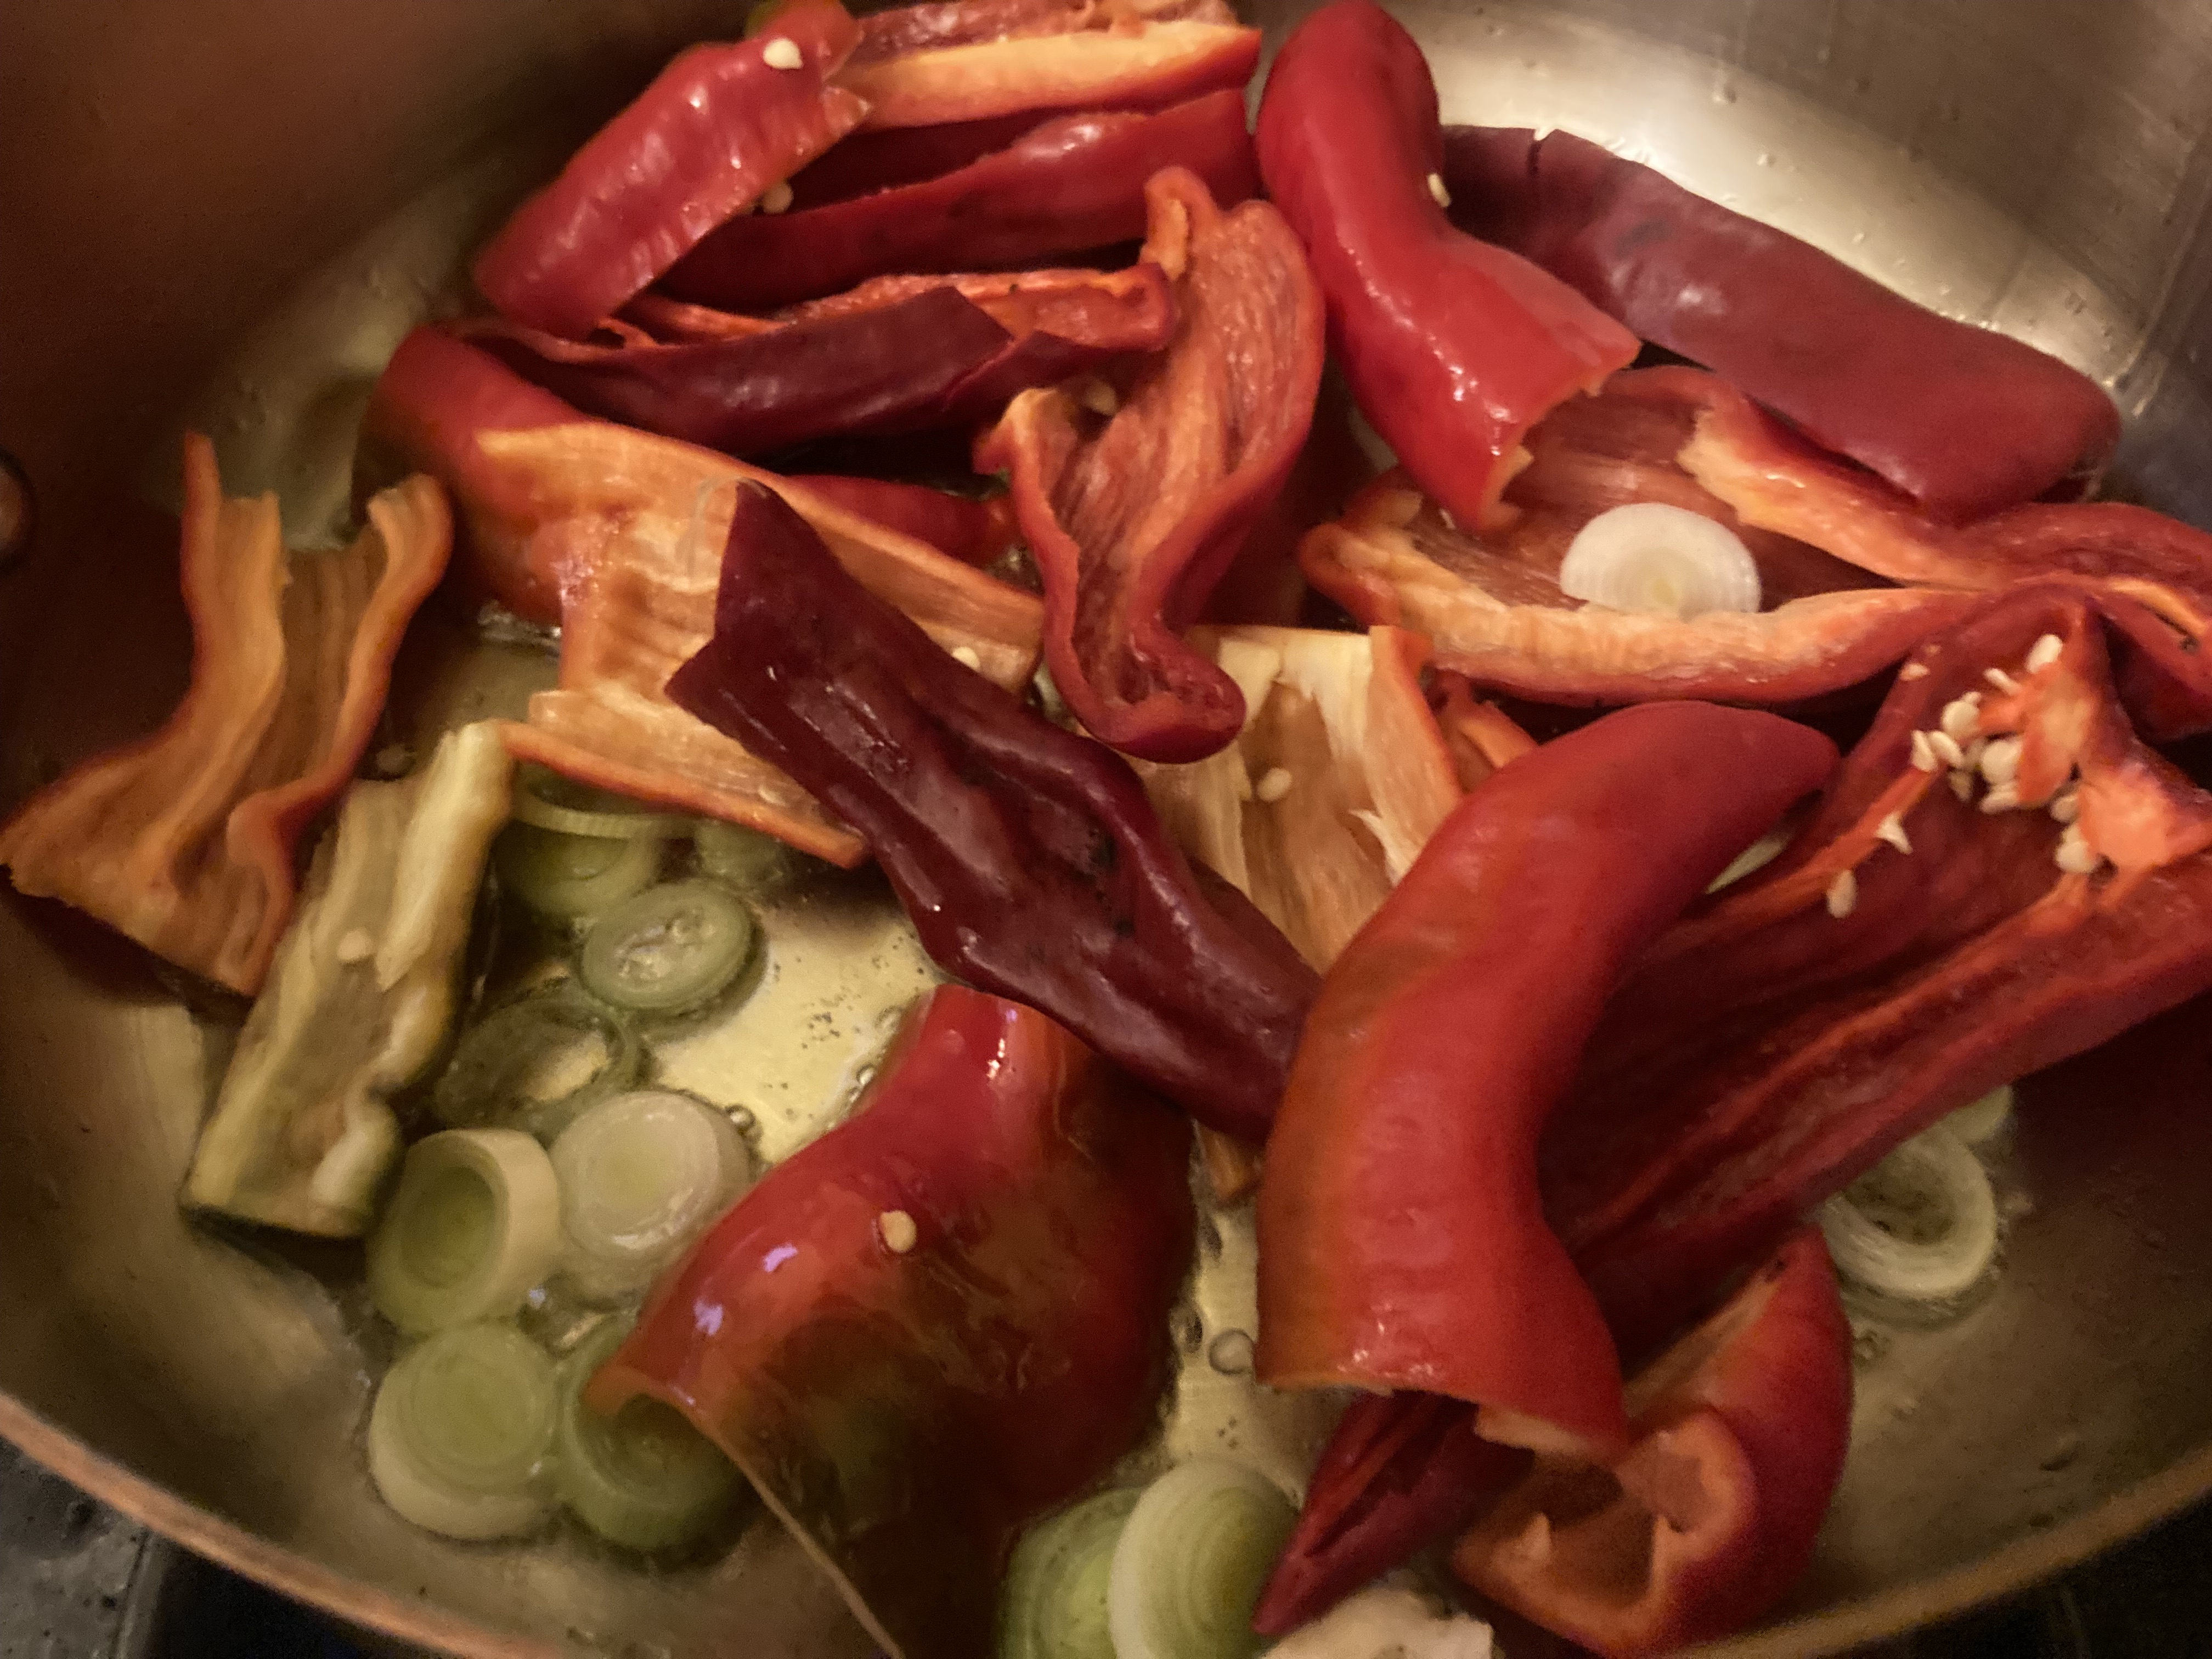
I love making fresh chili sauces, so when I saw these espelette beauties, I knew what I had to do. I always make any chili sauce in a small batch so it will keep about two weeks and stay vibrant. I used a dozen good sized espelettes and got about two cups of beautiful salsa. It didn’t emerge as the Italian American lipstick of my dreams, but rather as a clear, deep orange, also a lovely shade. It had a nice balance of sweet, acid, and heat.
So here’s what I did:
I roughly chopped and seeded my dozen espelettes. I then heated a little olive oil in a good-size sauté pan, dropping in the chilis and letting them sauté over medium heat for a few minutes, to start softening. I added a small, chopped summer onion and a big garlic clove, sliced, plus some salt, and let that sauté for a minute or so longer. Then I added about ½ teaspoon of allspice and a teaspoon of sugar, letting them warm through to release their flavors. I gave everything a splash of thyme vinegar (if you don’t have that, just add a few thyme sprigs when you add the allspice), and let it bubble for a few seconds. I threw in about a half a cup of warm water, turned the heat down a notch, covered the pan, and let everything simmer until the chilis were very soft, about another 8 minutes. Then I turned off the heat, added a drizzle of fresh olive oil, and let things cool off a bit before puréeing the result in a food processor. Taste it after you purée for a good balance of salt, sweet, and acid, adjusting as needed.
Posted in Uncategorized on August 8, 2023| Leave a Comment »
Posted in Uncategorized on July 27, 2023| Leave a Comment »

Still Life with Green and Black Olives, Vita Schagen
Often I have a hundred ideas about how to start a meal—and those ideas add up to appetizer chaos. Too many options? I’m not sure. My need to feed from beginning to end is strong, but it’s got to be smooth. Each meal must be of a piece, all the courses fitting together to create a meaningful flow. That’s not so hard in concept, so why do I get confused in my kitchen?
When I first read Lulu’s Provençal Table, Richard Olney’s book about Lulu Peyraud, a famous home cook of Provence and a muse to Olney, Alice Waters, Kermit Lynch, Paul Bertolli, and Jeremiah Tower, I was surprised to learn she only had a handful of amuse-gueules, openers she offered on rotation. They inevitably involved tapenade or anchoïade (olive or anchovy spreads) served on little toasts, or buttered sardines served on little toasts, or fresh garlic and olive oil rubbed on little toasts. That is what happens when you focus your culinary mind exclusively on your region. If you’re a good cook, every dish can be a local jewel.
Being Italian American doesn’t always focus me enough. My soul is purely Mediterranean, but living in Manhattan I’m hit with culinary influences from all directions and frequently derailed. When I’m truly focused I remember that my reason for cooking is to revisit the flavors I grew up with and love, and to let those flavors naturally evolve. I’m not here to create fancy new versions of haikara soba.
So I was recently putting together a little birthday dinner for a good friend. I set out to buy olives but was immediately frustrated to find that my market had only Gaetas, not my favorite olives. I went looking for the smaller, sweeter Taggiasca ones from Liguria, but my shop was out. I bought the Gaetas anyway. They tasted a bit sharp, so I figured I’d doctor them up, settling on the rosemary fennel flavor combination that I wrote about in my last blog and find so appealing. Then I decided to bake the olives, something that I hadn’t done in a long time and had sort of forgotten was a thing to do. It’s a good solution if you ever need to mellow out a batch of sharp olives.

Here’s what I did:
Get out a nice looking baking dish that will fit your olives fairly snuggly in one layer. For this version I scattered on a palmful of fennel seeds and a generous amount of fresh rosemary sprigs. I also added the budding tops from a bunch of garlic scapes I had on hand. Then I drizzled on some good olive oil and added a few turns of coarse black pepper. I gave it all a good toss and then baked it, uncovered, in a 400-degree oven for about 10 minutes, just until the olives were hot through and starting to look a bit puffy. The aroma was intense and really appealing. I let them cool off slightly before serving them, so my guests wouldn’t burn themselves, but they were definitely still warm and juicy to bite into, and that is the beauty of this simple appetizer. It feels more substantial that cold olives, more like real food. Everyone loved it. And it will be a good thing to remember the next time I freak out trying to come up with a simple opener to get a meal flowing.
Posted in Uncategorized on July 15, 2023| Leave a Comment »

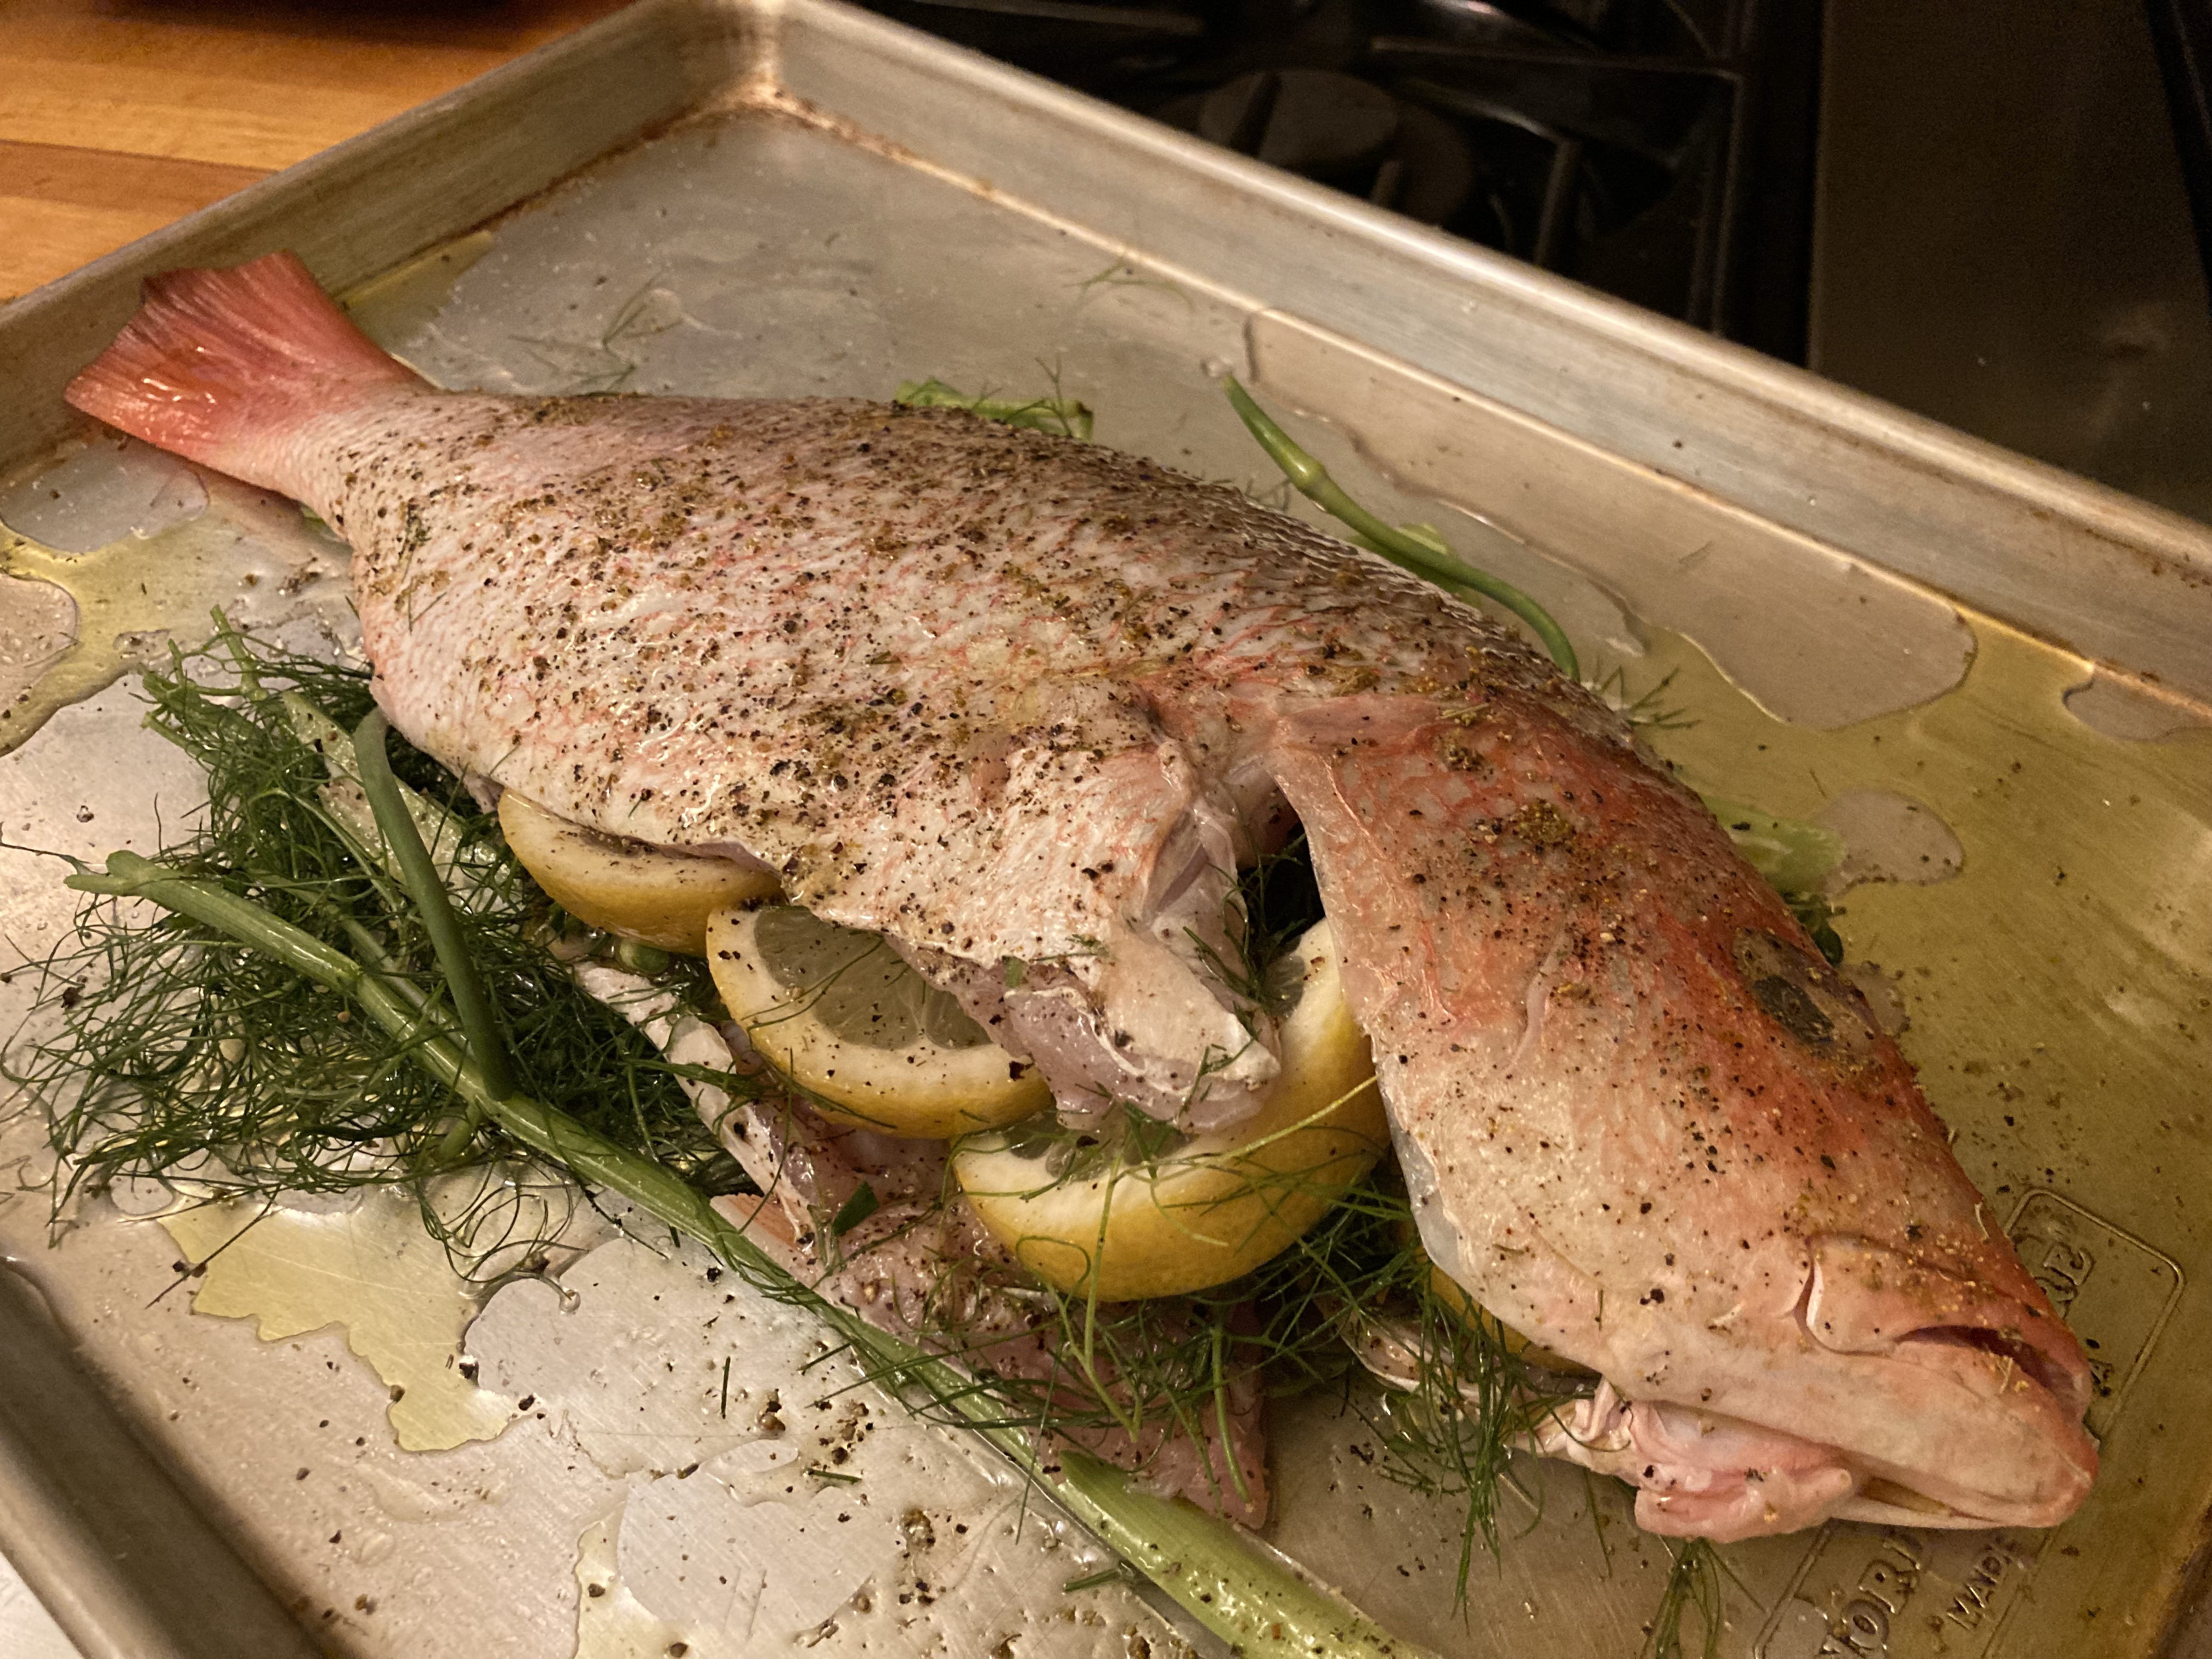
Recipe below: Roasted Red Snapper with Fennel Rosemary Vinaigrette
It has been pouring here on and off for about two weeks. My basil is flooded and my garlic soaked. I’m worried. My garden needs a dryout. And I’ve been dreaming of fancy outdoor grilling, but due to all this rain, it has not yet happened. I love doing a whole fish on the grill. It’s a romantic experience, and with all the herbs I’ve got growing, providing they’re not all drenched out, it can be high-end fragrant. I will get out there soon, I promise you. In the meantime, I’ve been at my oven, which is also a very good place to cook a whole fish.
As you’ve all heard a zillion times, cooking fish whole brings out more flavor than just doing a fillet. I don’t like to beat you over the head with this, but it’s true. Everything stays contained under the skin—the fat, the natural moisture, the gelatinous stickiness from the bones, plus all the flavors you stuff inside it. I think the hesitation for most people is not knowing when the fish is cooked, but that’s not hard to gauge. I like a high-heat roast, so I’ll go with 425, even 450 degrees. My 3½ pound red snapper took about 20 minutes. I started checking after about 15 minutes by inserting a paring knife alongside the backbone to see if the meat could be lifted from the bone but stay pretty much in one piece. Once it could, the fish was ready. I didn’t let it get into “easily flaked” territory, especially since a fish will continue to cook a little after you take it out.
I went to the market looking for my favorite little rougets (called red mullets in this country), but my fish guy at the Chelsea Market was all out. I guess I had the color red on my mind, so I instead went with a red snapper, a beautiful fish, very mild and white-fleshed. For flavoring I returned to my much-loved fennel rosemary blend, a tradition for porchetta that works well with all sorts of seafood as well. Fennel alone is, of course, classic with fish, but when you blend it with rosemary the flavor is fuller yet not overly assertive. A deep perfume develops.
Extra-virgin olive oil
1 whole red snapper, gutted and scaled (mine was about 3½ pounds)
Salt
Black pepper
A handful of stalks from wild fennel, or 1 large bulb fennel sliced lengthwise, plus a bunch of fronds
About 10 large rosemary sprigs
2 lemons, 1 sliced into half rounds, the other cut in half
3 whole summer garlic cloves, lightly crushed
A splash of dry vermouth
A teaspoon of fennel pollen
5 or so flat-leaf parsley sprigs
Heat the oven to 425 degrees.
Get out a small sheet pan or a large roasting pan, and drizzle in some olive oil. Coat the fish well, inside and out, with olive oil, and season it with salt and black pepper. Place the fennel stalks or slices in the pan, and lay the fish on top. Stuff the fennel fronds and half of the rosemary inside the fish. Stick as many lemon rounds as you can inside. The rest place around the fish. Stick the garlic inside the fish. Drizzle the vermouth over the fish.
Put the fish in the oven.
While the fish is roasting, chop the remaining rosemary well. Put it in a small bowl, along with the fennel pollen, about ½ cup of good olive oil, and the juice from the cut lemon. Chop the parsley, and add it to the sauce. Season with salt and black pepper, and give it a good stir. Let the sauce sit to develop flavor while the fish continues to cook.
My fish took about 20 minutes, but you’ll want to check by sticking a knife in along the backbone. If the meat pulls away from the bone but stays more or less in one piece, it’s ready. You don’t want to cook it any further than that. If it’s really flaky, it’s slightly overcooked. Depending on the size of your fish, I’d start checking after 15 minutes.
Let the fish sit for about 5 minutes so it can settle. Pull the skin off, and fillet the top side, plating it. Pull out the skeleton, and lift the other side off its skin onto another plate. Take one of the garlic cloves out of the fish, and mince it. Add it to the vinaigrette, giving it a stir. Spoon the vinaigrette over the fish. Eat it right away.
Posted in Uncategorized on July 13, 2023| Leave a Comment »

What a prickly beauty. Big tail, small head. Will she ever get out without tiny, bloody scratches? I say, not likely. But artichokes are always worth the effort.
Posted in Uncategorized on July 3, 2023| 1 Comment »
Posted in Uncategorized on July 1, 2023| Leave a Comment »

Recipe below: Zucchini Gratin with Thyme and Goat Cheese
It seems a lot of people need help with zucchini, mostly with how to change it up from the usual pan sauté. I know I do, so when I come up with a good recipe, I want to share it with you. And if you’re growing zucchini and now have tons of it coming in all at once, you really do need help.
This is an easy gratin, but it looks kind of fancy. Good for a dinner party. I served it with huge grilled shrimp marinated in marjoram, garlic, and lemon, a nice fit but I could imagine grilled lamb or chicken kebabs just as easily. I’m thinking the grill texture and flavor would juxtapose nicely with the gentleness of the gratin.
Happy summer cooking to you.

10 medium zucchini (they will shrink up), cut into rounds
1 shallot, thinly sliced
Extra-virgin olive oil
Salt
Black pepper
1 small log (4 ounces) fresh, soft goat cheese, at room temperature
½ cup crème fraîche, at room temperature
¼ teaspoon ground nutmeg
1 small summer garlic clove, chopped
Possibly a little milk
12 big sprigs fresh thyme, lightly chopped but with flowers if it has them
¾ cup grated grana Padano cheese
Preheat the oven to 425 degrees.
Oil a large sheet pan. Lay the zucchini out on it in more or less one layer (a little overlap is fine). Scatter on the shallot, drizzle with olive oil, and season with salt and black pepper. Roast until the zucchini just starts to brown lightly at the edges, about 8 minutes or so. I find this step important for removing excess water from the zucchini. If you skip it, your gratin may wind up quite liquidy.
Put the goat cheese and crème fraîche in a food processor. Add the nutmeg and garlic, and season with salt and black pepper. Give the mixture a few pulses to blend everything. It should be thick but pourable, a bit thicker than heavy cream. If it’s too thick, add a drizzle of milk and pulse again.
Get out baking dish. I used a 11-by-8-inch Le Creuset oval, but anything more or less equivalent will work fine. Oil the inside lightly. Add half of the zucchini, spreading it out. Sprinkle on half the thyme and some grana Padano. Add the rest of the zucchini.
Pour the goat cheese cream evenly over the top, and wait for it to sink into the zucchini a little. Sprinkle on the rest of the grana and the remaining thyme. Bake, uncovered, until it’s bubbly and the top is browned, about 12 to 15 minutes.
Let the gratin cool a few minutes before serving, so it can firm up.
Posted in Uncategorized on June 28, 2023| Leave a Comment »

Recipe for a soft herb salad in the next-to-last paragraph below.
So far all my herbs look good. I knew they were starting out in that direction when in early spring my lovage came bursting out of the ground and grew huge in only three weeks. Lovage is a powerhouse herb, in growth but also in taste, like celery condensed into a speeding bullet. I use only a leaf or two when I cook a pot of beans or make a potato salad. I find it interesting that the herb I use the least of is the biggest thing in my garden. Although my fennel is also already gigantic.

I planted a lot of other herbs this year too, some, like hyssop and za’atar, for this first time. They all look promising. I always lighten up when I see that my plants are starting to take. My father had the same early season gardening anxiety when he planted and tended his tomatoes. He’d be out in his garden at weird hours, chain-smoking and staring hard at the little seedlings, maybe trying to instill some fear in them. I’m not sure what his method was, but we always had good tomatoes. I go out to my herb garden and stare and worry and sometimes plead with them. It’s part of the process.

Up here in Dutchess County, New York, only a handful of herbs are perennial, and sometimes even the perennials get defeated by our miserable winters. But this year everything I hoped would come back did. In addition to my out-of-control lovage and fennel, all my various thymes and oreganos returned, as did my nepitella, winter savory, tarragon, sage, and borage, which is popping up all over the place. The lavender didn’t make it this year, and rosemary always gets freezer burn and needs a fresh start. That makes me sad, especially knowing how big and gorgeous those things can get in the right climate. This slate-riddled upstate soil, frozen for months each year, is obviously nothing like the Southern Mediterranean, but my Southern Italian blood pushes me to pretend it is. I just have to keep on top of things.
In the meantime, here’s something nice you can make with fresh herbs, whether you have five or six types or only a couple. It isn’t so much a recipe as a reminder that you can make a salad out of nothing but herbs.

When I compose an herb salad I concentrate on leafy, soft, gentle herbs, avoiding piney, musty, and tough-stalked ones like rosemary, thyme, oregano, and sage. For this version I clipped Italian parsley, burnet, chervil, fennel fronds, a few sprigs of tarragon, and a handful of watercress, which I consider an herb. You can add arugula or sorrel, or lots of basil (my basil isn’t yet big enough to pick from). I prefer to dress an herb salad with my best olive oil, a tiny splash of rice wine vinegar, and a sprinkling of salt. I find a gentle vinegar best here, even better than lemon, which to my taste, can be too direct.
This salad is good to eat neat, but it also makes a nice, perfumed bed for something grilled, like shrimp, lamb kebab, or eggplant.


